How to Transfer Photos from an iPhone to Computer


Transferring photos from your iPhone to a computer is essential for backing up memories, freeing up storage, or editing images on a larger screen. Whether you're using a Windows PC or Mac, multiple methods are available to help you efficiently import photos.
This guide explores the best ways to transfer photos from iPhone to computer, including iCloud, USB cable, and third-party transfer apps like AltTunes. Quick comparison table for the ones of you in a rush:
Method | Speed | Storage Required | Best For |
|---|---|---|---|
Photos App & Explorer App | Fastest | Based on device | Quickest transfers |
iCloud Photos | Moderate | Requires iCloud storage (5GB free) | Wireless Internet sync |
AltTunes | Fast | Based on device | Bulk transfers & additional features |
Google Photos | Moderate | Requires Google storage (15GB free) | Best free choice |
Psst. This quick video will walk you through the solution in a few minutes:
Transfer photos from iPhone to Computer with AltTunes
AltTunes provides the most comprehensive and straightforward experience for exporting data from iPhone to computer. On top of that, it also enables you to backup iPhone without iCloud.
AltTunes is an ultimate tool that helps you with managing your photos and any other files on iPhone quickly effortlessly.
Step 1. Install AltTunes to your PC
AltTunes is a desktop companion app for your iPhone, becoming your essential device manager for backup purposes. In addition to facilitating backups, it offers versatile file transfer capabilities for various data types, including images, music, videos, contacts, text messages, and more.
The app is available for free download and usage during the free trial period. Feel free to give it a try!
Step 2. Pair it with your iPhone
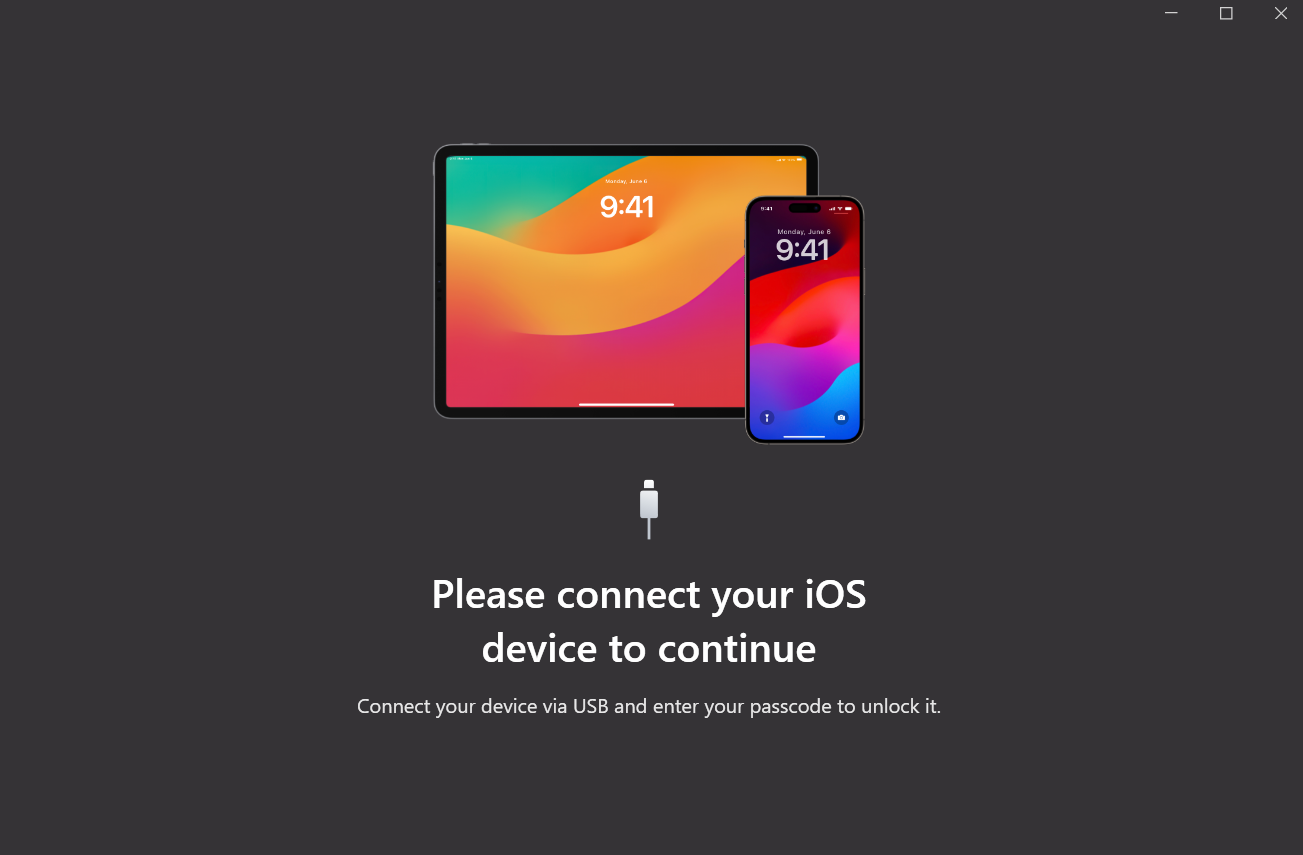
The subsequent step to export iPhone photos to your PC involves connecting both devices through USB. Launch AltTunes and, specifically for the first time, use your iPhone's charging cable. If your device is locked, unlock it and allow the "Trust this computer" prompt.
After a few seconds, your iPhone will be successfully paired. While this process may feel a bit cumbersome for the first time, you can opt for the Wi-Fi mode for subsequent connections. Just ensure that both devices are connected to the same Wi-Fi network.
Step 3. Pick your photos and transfer them
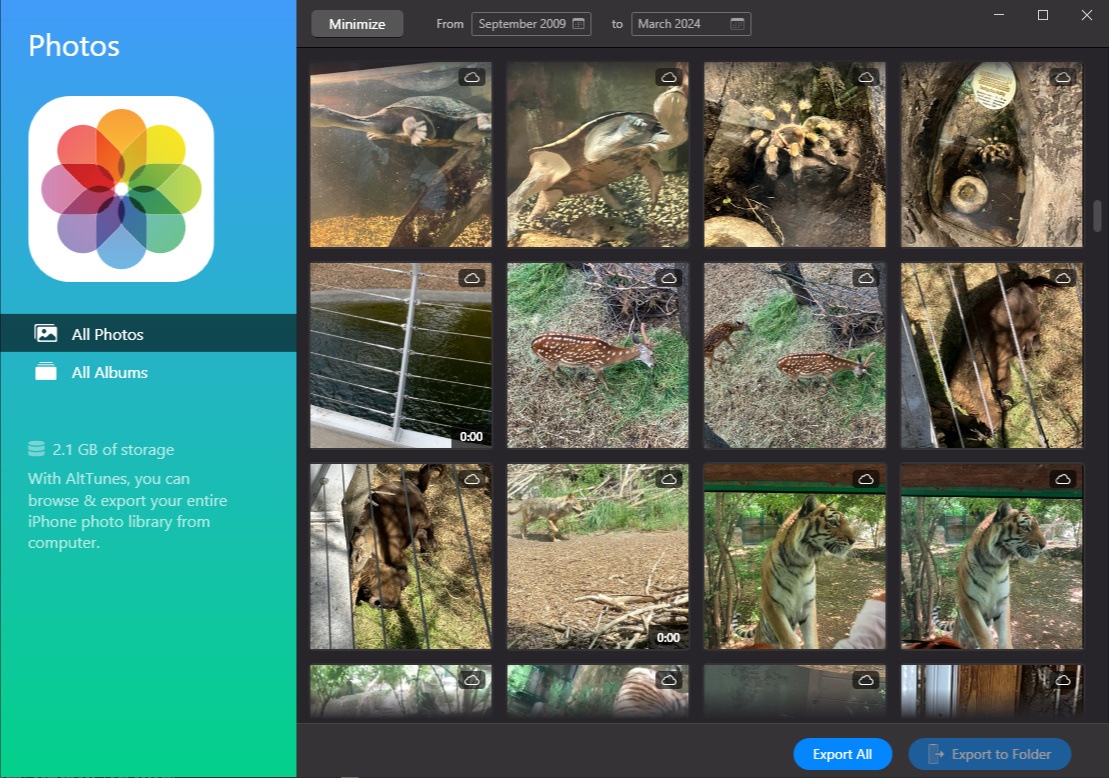
Here's how to transfer photos from your iPhone to your PC without USB. Once your iPhone is connected, it will appear in the left sidebar.
1. Select your iPhone, and all the system apps will be displayed.
2. Choose the Photos category, and AltTunes will present all the images. (Refresh if you don't see the recent ones)
3. Select the photos you want to save on your PC. (Use the Ctrl/Command and Shift keys to select multiple photos)
4. Click the Export button. In the open dialog box, choose where to store those precious moments.
Alternatively, you can drag and drop the selected photos onto the desktop or an open folder instead of clicking the Export button.
💡 If you're transferring a large number of photos, be aware that your iPhone might enter sleep mode during the process, which can interrupt the transfer. A simple workaround is to play a long video on your iPhone during the transfer — this keeps the screen active and prevents the device from sleeping.
Transfer Photos from iPhone to PC Using a USB Cable
One of the simplest ways to move photos from iPhone to PC is by using a USB cable and the built-in Photos app or with the Explorer app on Windows.
Steps to Import Photos with Windows Photos App:
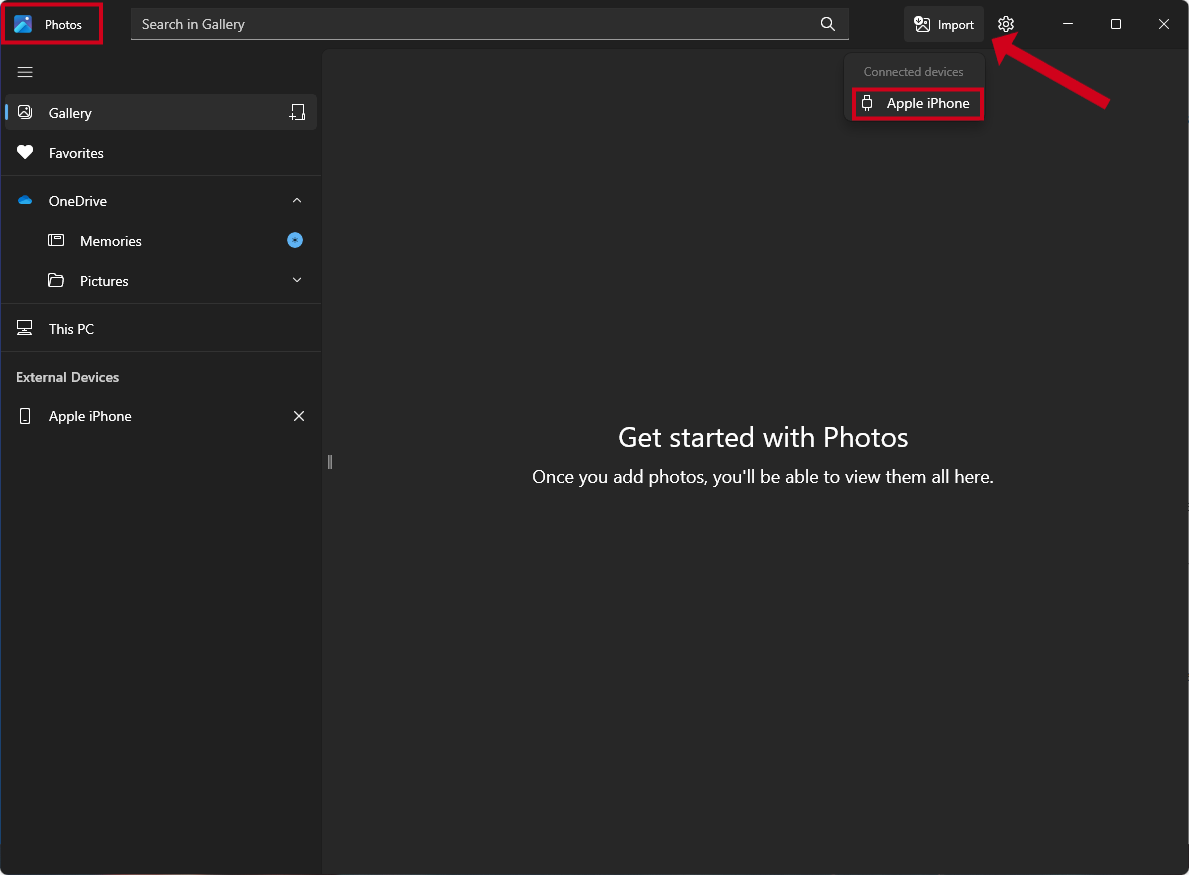
- Connect your iPhone to PC using a USB cable.
- Unlock your iPhone and tap "Trust This Computer" if prompted.
- Open the Photos app on your Windows PC.
- Click Import > Apple iPhone.
- Choose the photos you want to transfer and select the destination folder.
- Click Import Photos to complete the transfer process.
This method is best for users who want to quickly import photos from iPhone to a Windows device without using cloud services.
Transfer Photos from iPhone to Computer with File Explorer
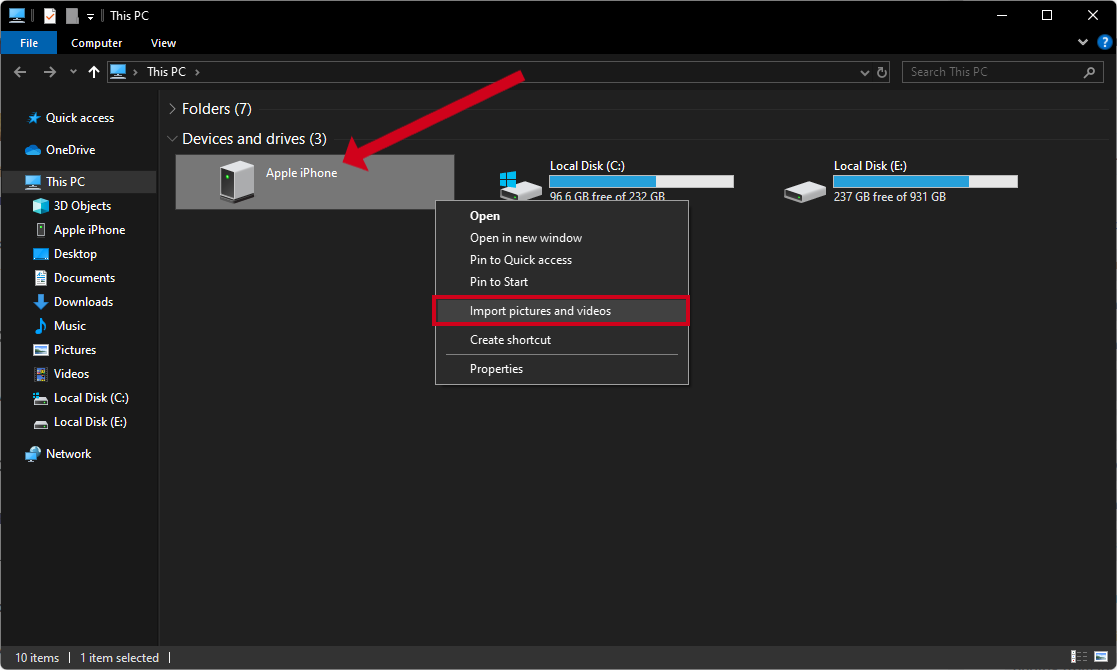
- Connect your iPhone via USB.
- Unlock your iPhone to allow file access.
- Open File Explorer: Your iPhone will appear under “This PC.”
- Right-click and select Import Pictures and Videos.
- Choose Import Options: Decide whether to import all items or organize them manually.
After the import is complete, the folder containing the imported images and videos will automatically open in your Pictures folder. To locate it, open File Explorer and click on Pictures. Alternatively, you can search for it in the Start menu. This allows you to access and organize the imported media easily.
For extra storage management, consider how to move photos to the cloud—a great way to free up space on your device.
Transfer Photos Wirelessly via iCloud
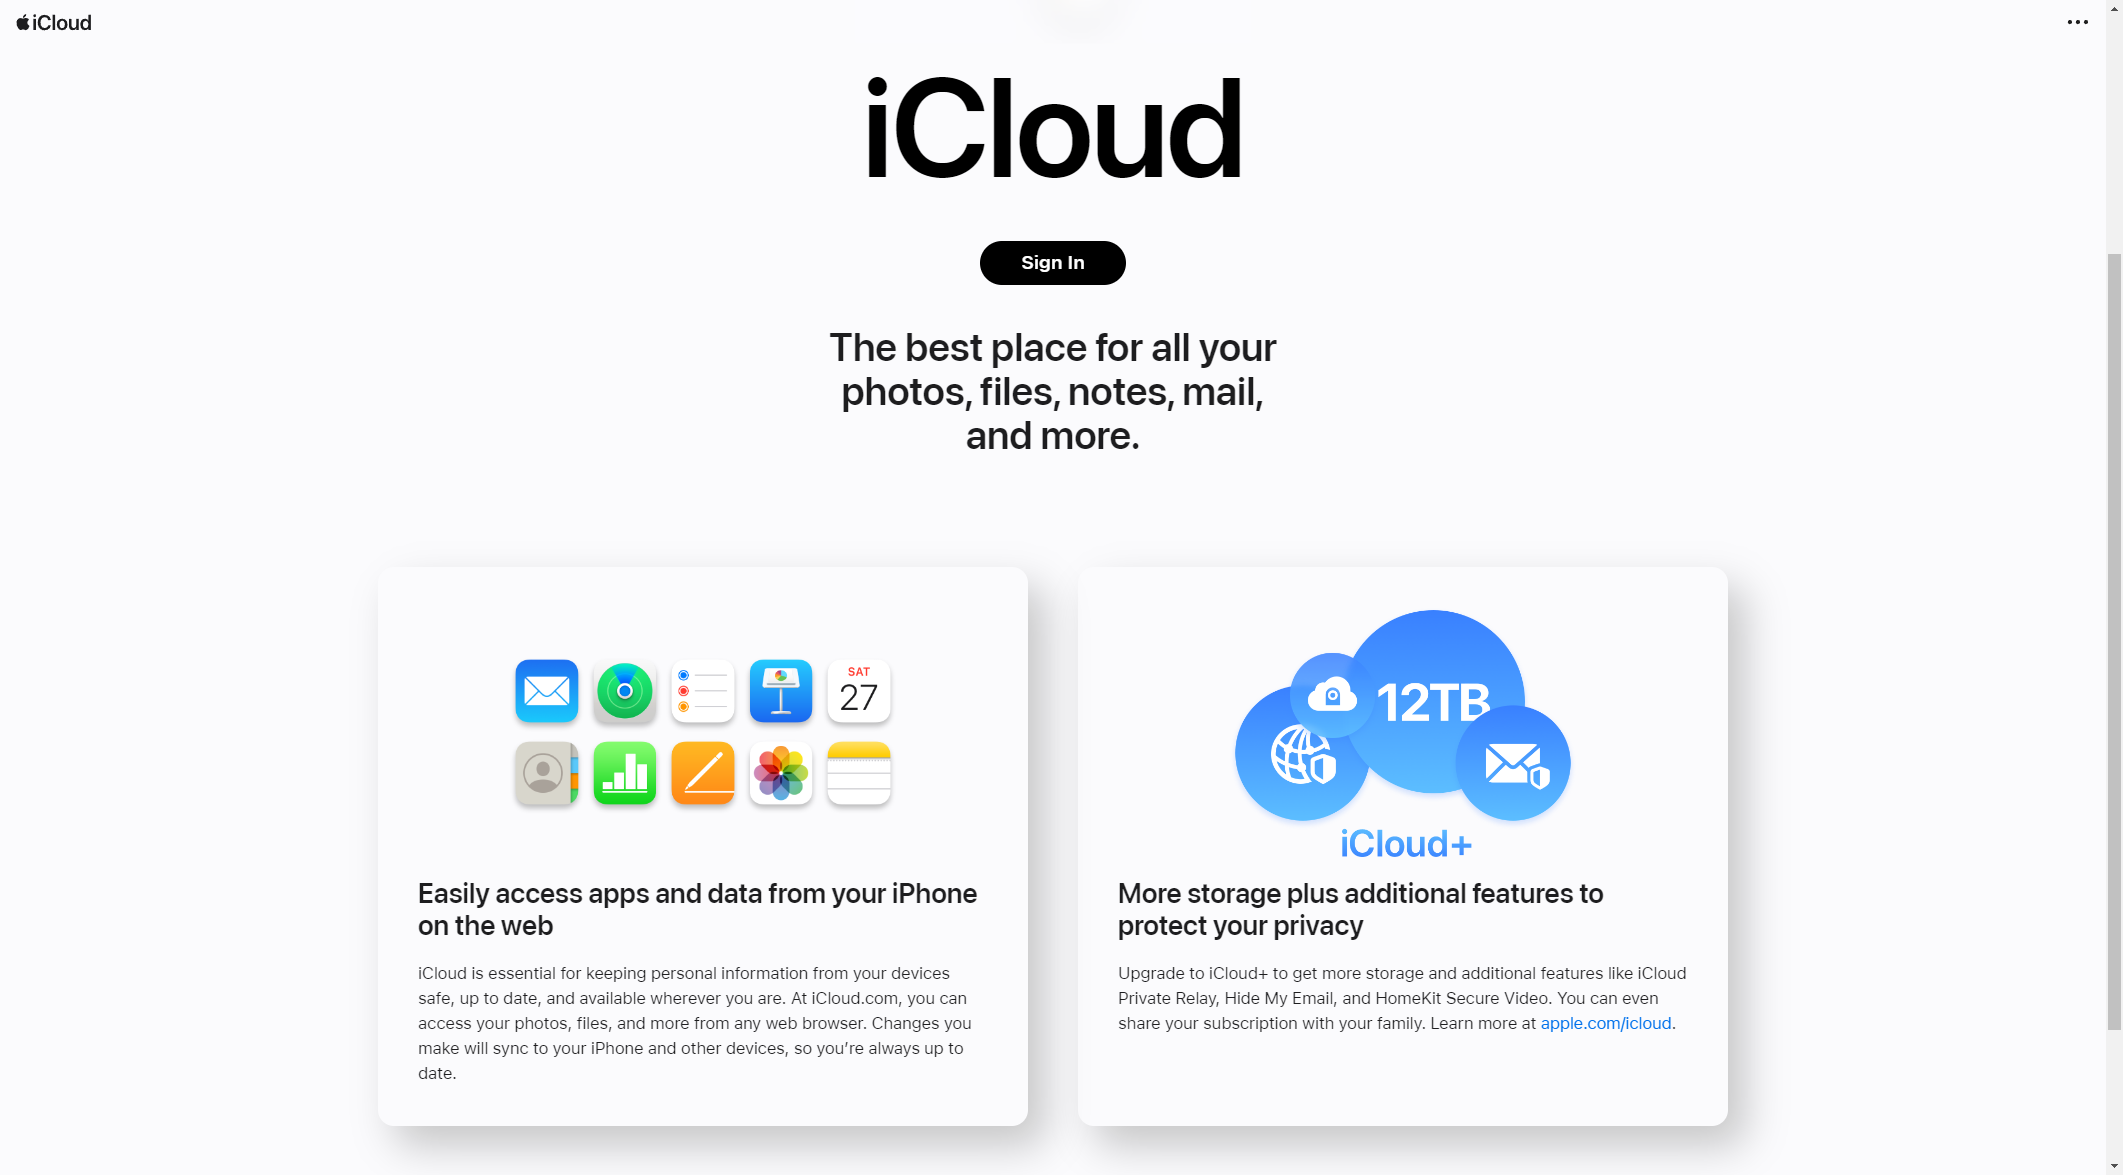
If you prefer a wireless method, iCloud Photos lets you transfer photos from iPhone to Windows PC relatively fast and from anywhere as long as the place have a decent internet connection.
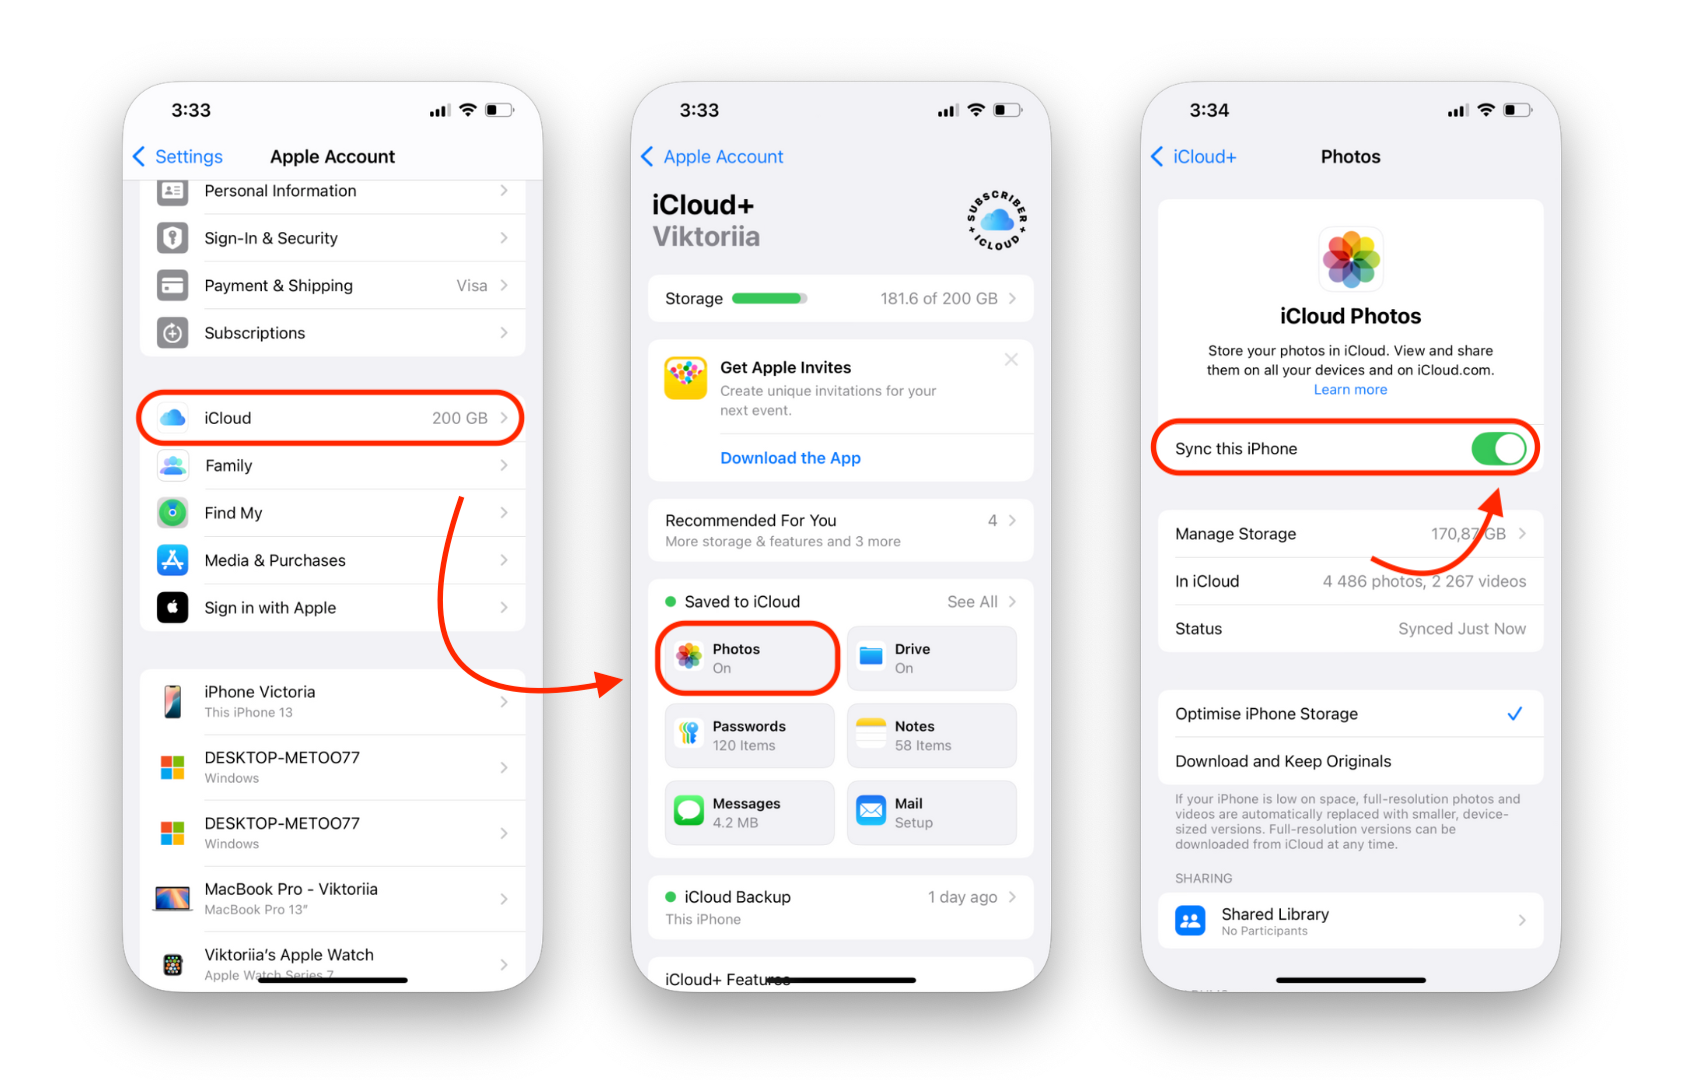
Enable iCloud Photos on iPhone:
- Go to Settings > [Your Name] > iCloud > Photos.
- Turn on iCloud Photos.
- Connect your iPhone to Wi-Fi so it uploads your photos and videos to iCloud.
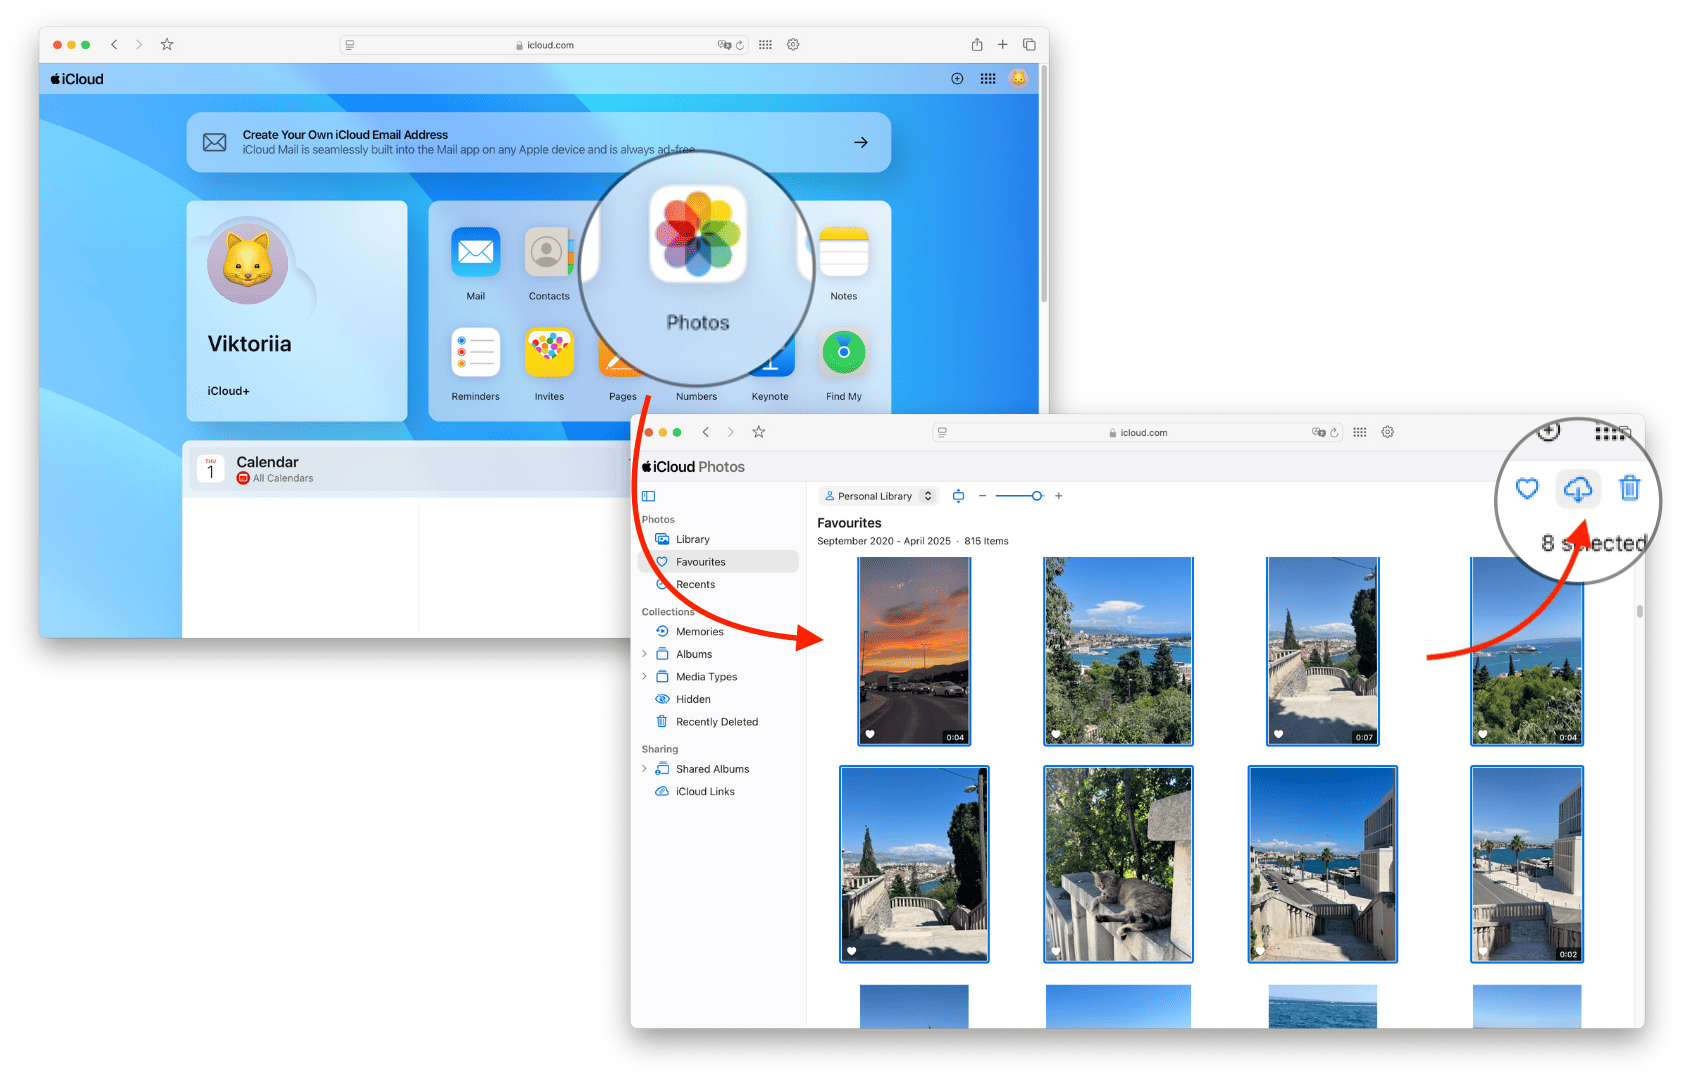
Download Photos from iCloud to PC:
- Open a browser and visit iCloud web page.
- Sign in with your Apple ID.
- Click on Photos.
- Select the photos you want to transfer.
- Click the Download button to save the imported photos to your PC.
You get 5GB of free iCloud storage, but you may need to upgrade for more space.
Transfer Photos Using Google Photos
If you need an alternative cloud option, Google Photos allows easy photo transfer from iPhone to PC.

Steps to Upload Photos to Google Photos:
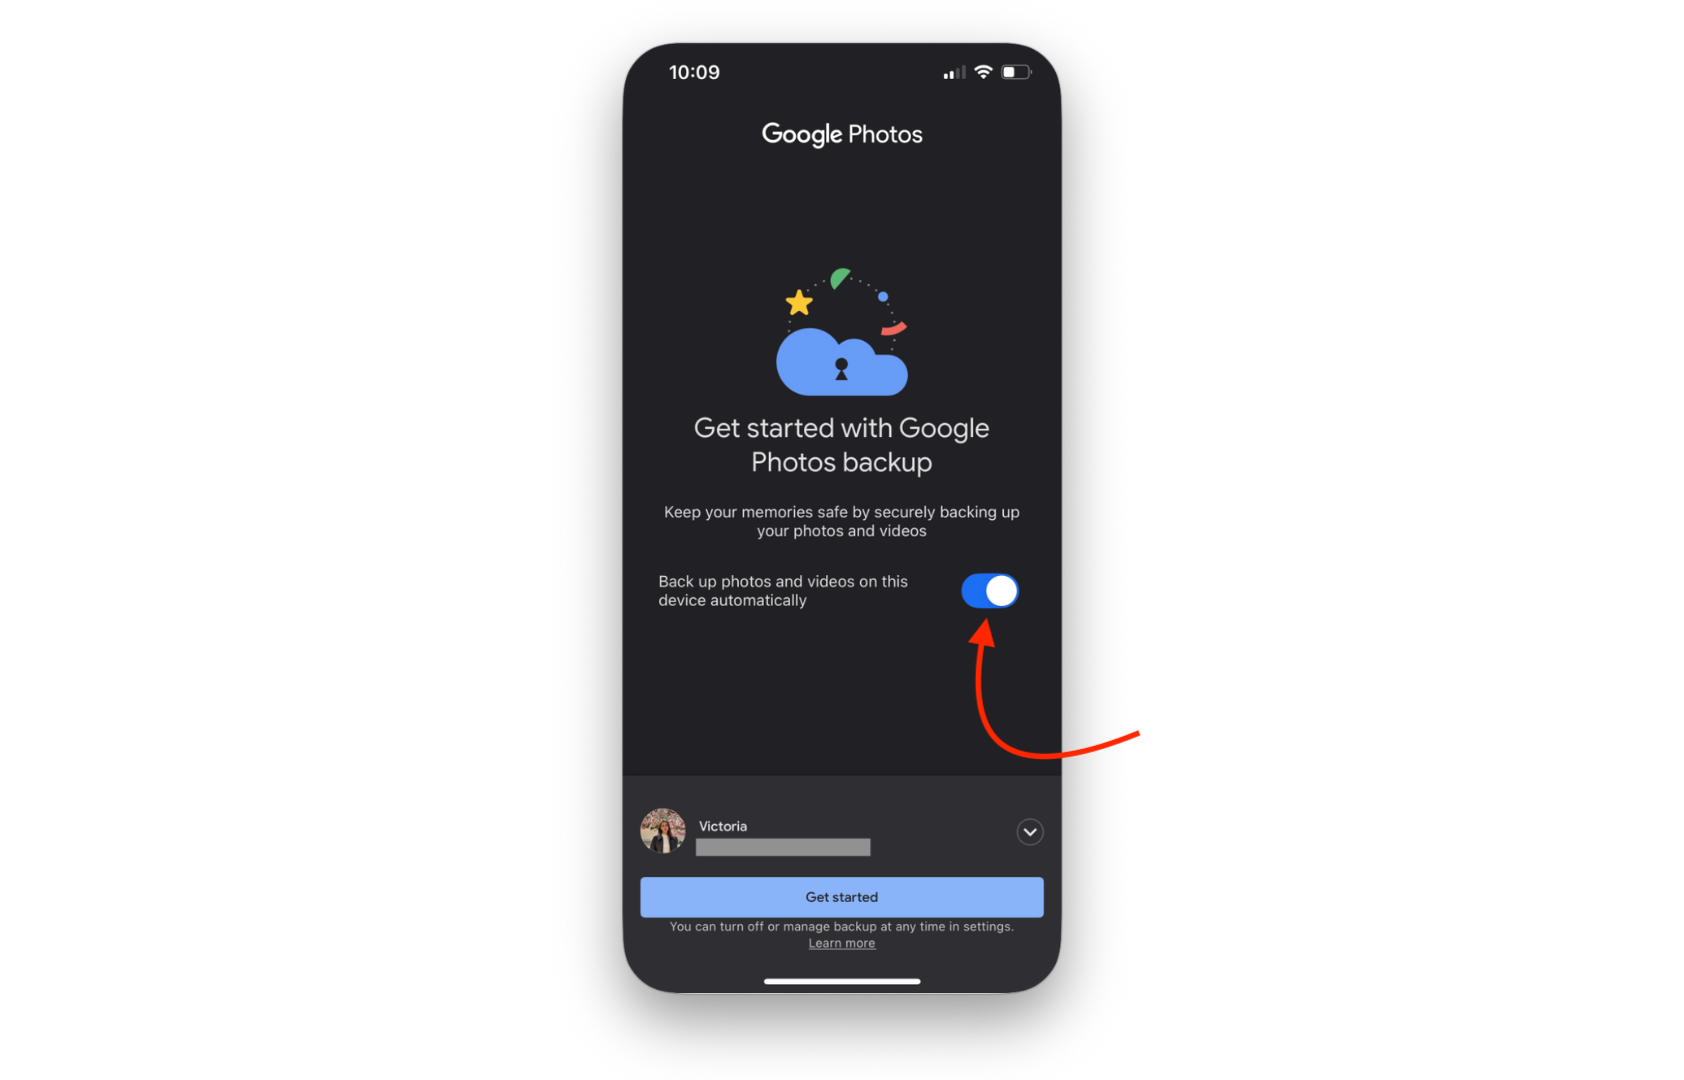
- Download the Google Photos app on your iPhone.
- Open the app and sign in with your Google account.
- Tap on Backup & Sync to upload photos to iCloud.
Download Photos on PC:
- Go to Google Photos web page.
- Select the photos from your iPhone you want to save.
- Click Download to copy photos to your PC.
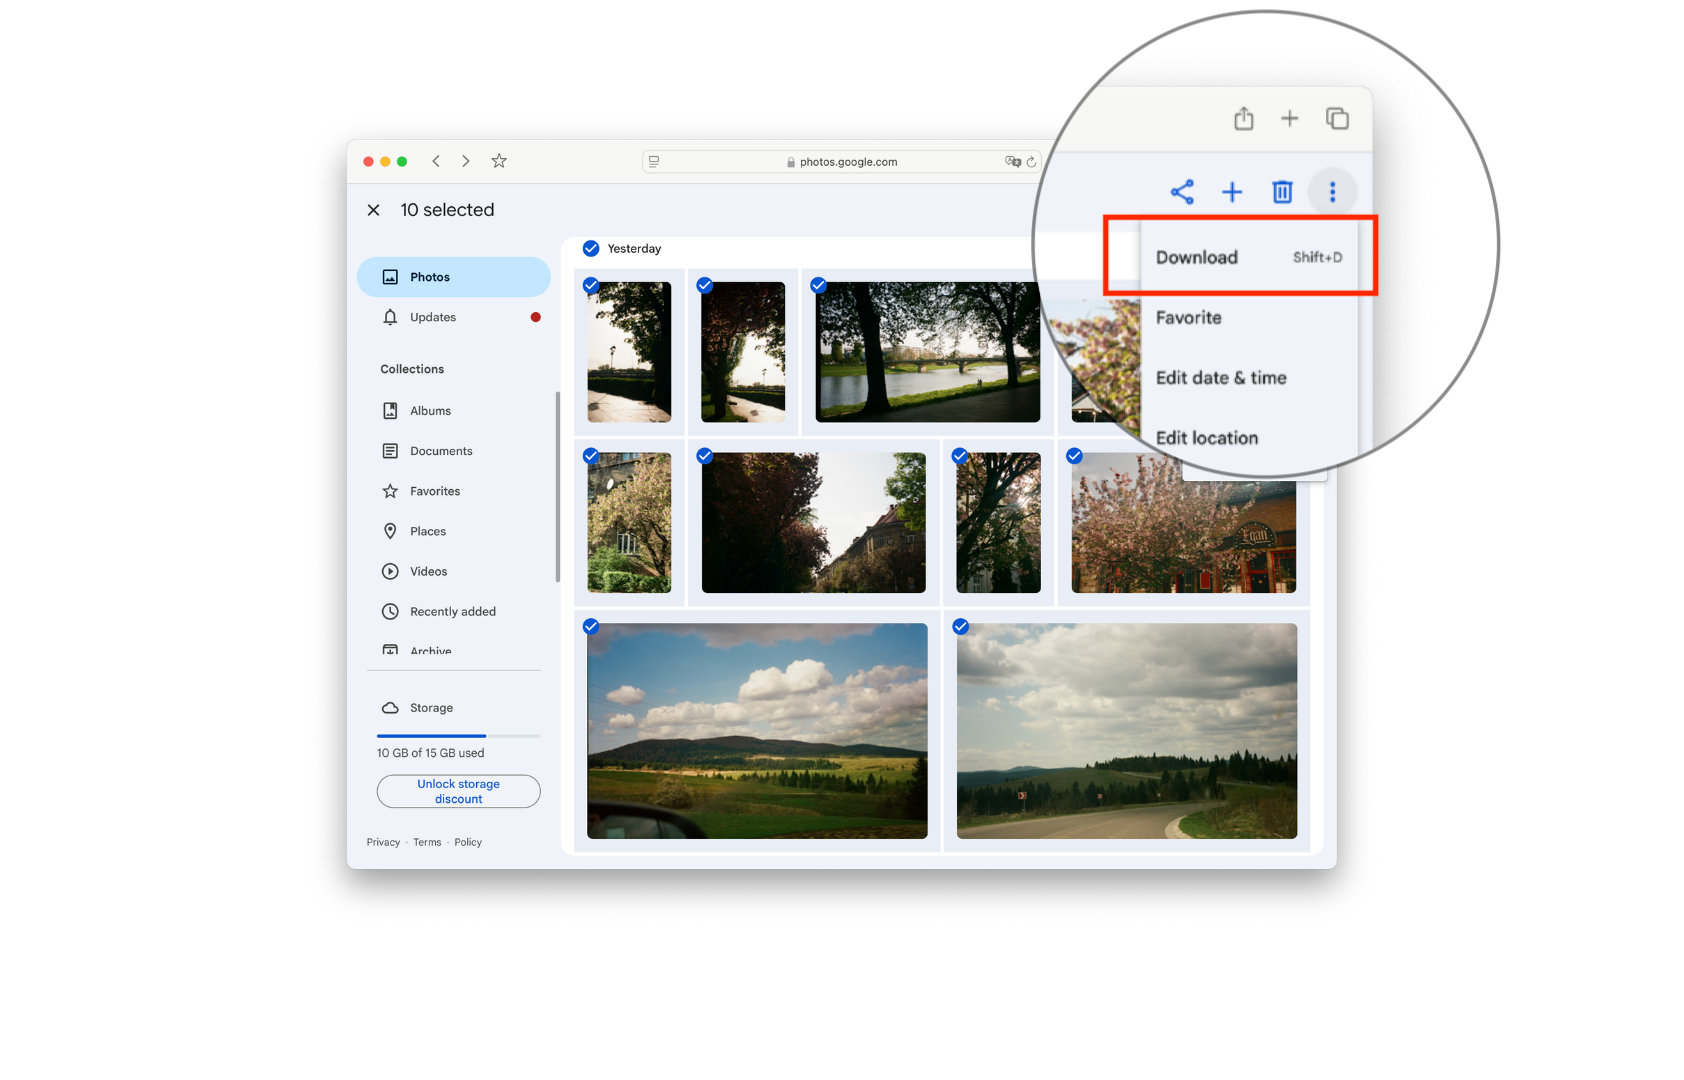
Google Photos offers 15GB of free storage, making it an excellent photo transfer option.
Bottom Line
Whether you want to transfer photos using a USB cable, iCloud, or a third-party transfer app, these workable ways to transfer photos ensure your memories are safely backed up.
For the fastest transfers and full file management, AltTunes is the best transfer app to connect your iPhone to your PC and move your photos with ease.
FAQ
How do I transfer photos from iPhone to my PC quickly?
You can transfer your iPhone photos to a PC using a third-party desktop app designed for easy media transfer. Simply connect your iPhone via USB or Wi-Fi, and you’ll be able to select and export your photos to a chosen folder on your computer.
Can I transfer iPhone photos to my PC without using iTunes?
Yes, you can transfer your photos without iTunes by using a dedicated file transfer app. These apps allow you to move photos directly from your iPhone to your computer, bypassing the need for iTunes completely.
What’s the easiest way to move iPhone photos to a Windows computer?
Using a specialized transfer app is the most straightforward way. Once installed, you can connect your iPhone and export your photos with just a few clicks. Many of these apps also support wireless transfers if your devices are on the same Wi-Fi network.
Can I transfer photos from my iPhone to my PC wirelessly?
Yes, many apps offer wireless photo transfer from iPhone to PC. After enabling Wi-Fi mode, you just need to connect your devices to the same Wi-Fi network and initiate the transfer without needing a USB cable.
How do I transfer iPhone photos to my PC without using iCloud?
You can transfer photos from your iPhone to your PC without iCloud by using a third-party app or the built-in Windows Photos app. These tools let you move your images directly, without relying on cloud storage.

