How to Stream 4K H.265/HEVC Videos to Apple TV


If you've tried playing 4K H.265/HEVC files on your Apple TV and hit a wall, you're not alone. While Apple TV 4K handles many video formats well, it can be picky about which HEVC files it accepts.
Apple TV 4K natively supports MOV, MP4, and M4V files with H.264, H.265, and MPEG-4 codecs. However, MKV files and certain HEVC video configurations won't play directly on Apple devices.
This guide covers Apple TV support limitations, shows you how to play HEVC files, and introduces Beamer—a Mac app that lets you stream videos to Apple TV without conversion headaches. You can try Beamer free for 15 minutes to see how it works.
Apple TV 4K H.265 Support: What Works and What Doesn't
Apple TV 4K supports impressive video quality with four times more pixels than standard HD and HDR for richer colors. The 5th generation Apple TV and Apple TV 4K models support 4K video with high efficiency video coding (HEVC/H.265), which provides better compression and smaller file size compared to older codecs.
Here's what you should know about Apple TV video support:
- Video: H.264, HEVC (H.265), HEVC Dolby Vision, MPEG-4
- Resolution: HEVC SDR up to 1080p and supports resolutions up to ultra HD at 2160p at 60 fps (Main/Main 10 profile)
- Audio: HE-AAC, AAC, MP3, Apple Lossless, FLAC, Dolby Digital 5.1, Dolby Digital Plus 7.1, Dolby Atmos
The main difference between Apple TV 3rd generation and older models versus newer Apple TVs is that older units can't play HEVC due to hardware limitations. The catch with modern Apple TV support for HEVC? Your 4K HEVC files might use codecs Apple doesn't support.
Common problems include:
- Frame rates above 60 fps (like 120 fps)
- DTS audio tracks
- Non-standard container formats
- Specific encoding parameters
When Apple TV encounters these incompatible elements, users often ask "why can't my Apple TV play" certain files—it simply won't recognize them.
Converting vs. Streaming: Why Beamer Saves Time and Quality
Traditional solutions involve using a video converter to transform your H.265 files to Apple-friendly formats. This wastes hours and often ruins your videos:
Free online video converter tools produce corrupted output, missing audio, or quality loss after hours of processing.
Desktop video converter software works better but still forces you to wait for conversions and create duplicate files that eat up storage space.
Third-party media player apps like VLC or Plex can play HEVC on iPhone or iPad but require complex setup and don't always work smoothly on Apple TV.
Beamer skips conversion entirely. Stream files directly from your Mac to Apple TV in seconds, not hours. Keep your original quality, save your storage space, and start watching immediately. Unlike traditional video converter approaches, Beamer's unique feature is that you can directly drag files and start streaming without any import process.
How to Stream 4K H.265/HEVC with Beamer
Beamer lets you watch any video format on Apple TV, including AVI, MKV, WMV, MOV, FLV, and subtitle formats. This media player solution works as a decoder bridge between your Mac and Apple TV.
Beamer requires macOS and works only with Mac computers. Windows users will need alternative solutions for streaming unsupported formats to Apple TV.
Step 1: Download and Install
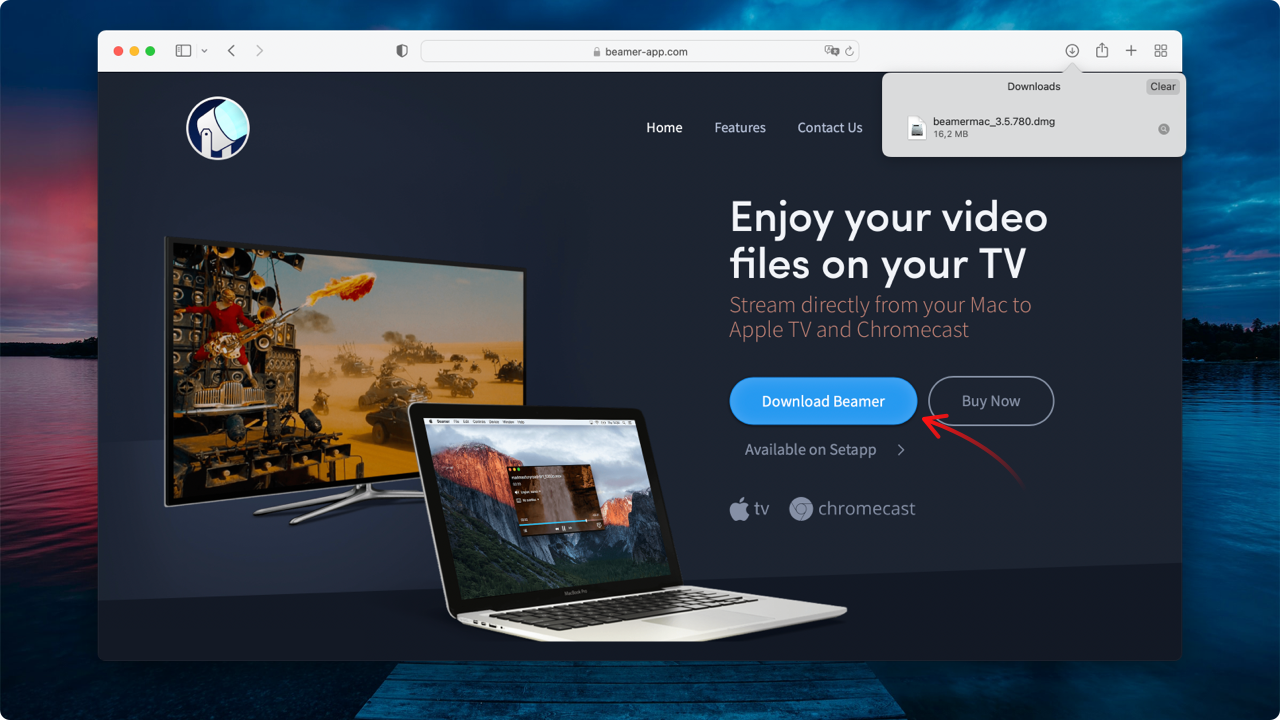
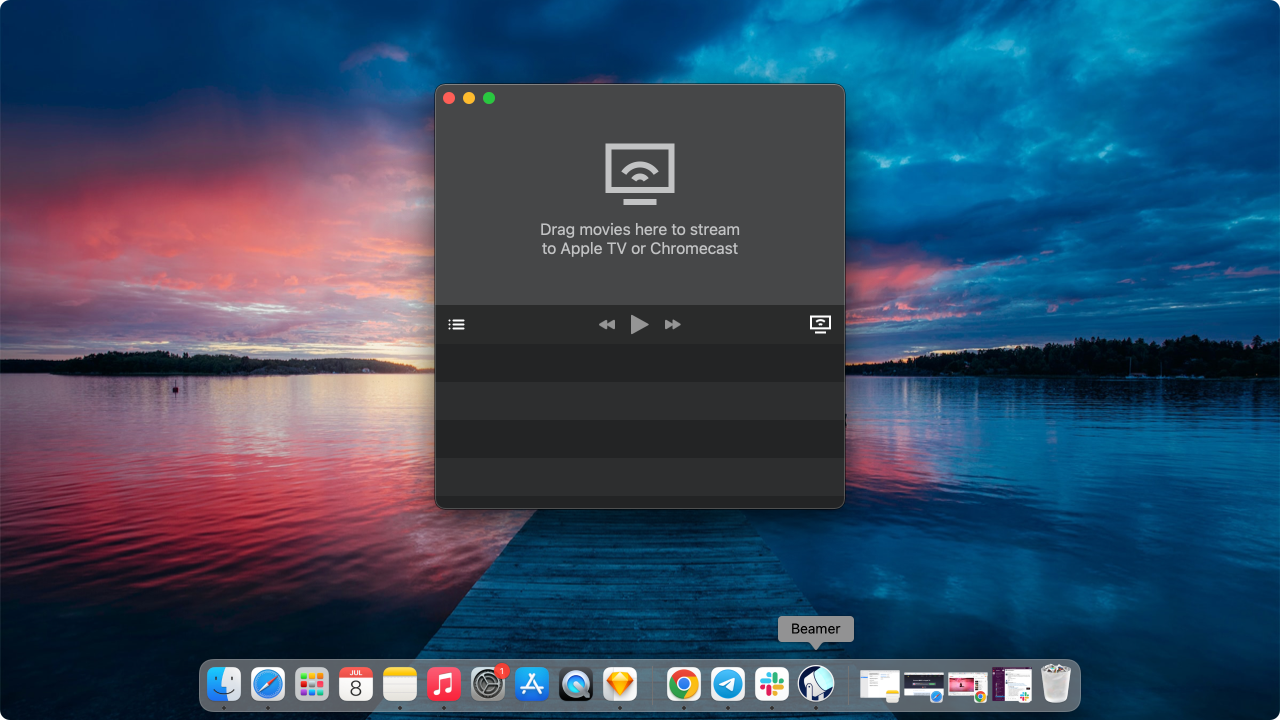
Download Beamer for Mac from Softorino's website. The interface is simple and user-friendly. After installation, launch the app to see a clean window ready for your files.

Step 2: Connect Your Device
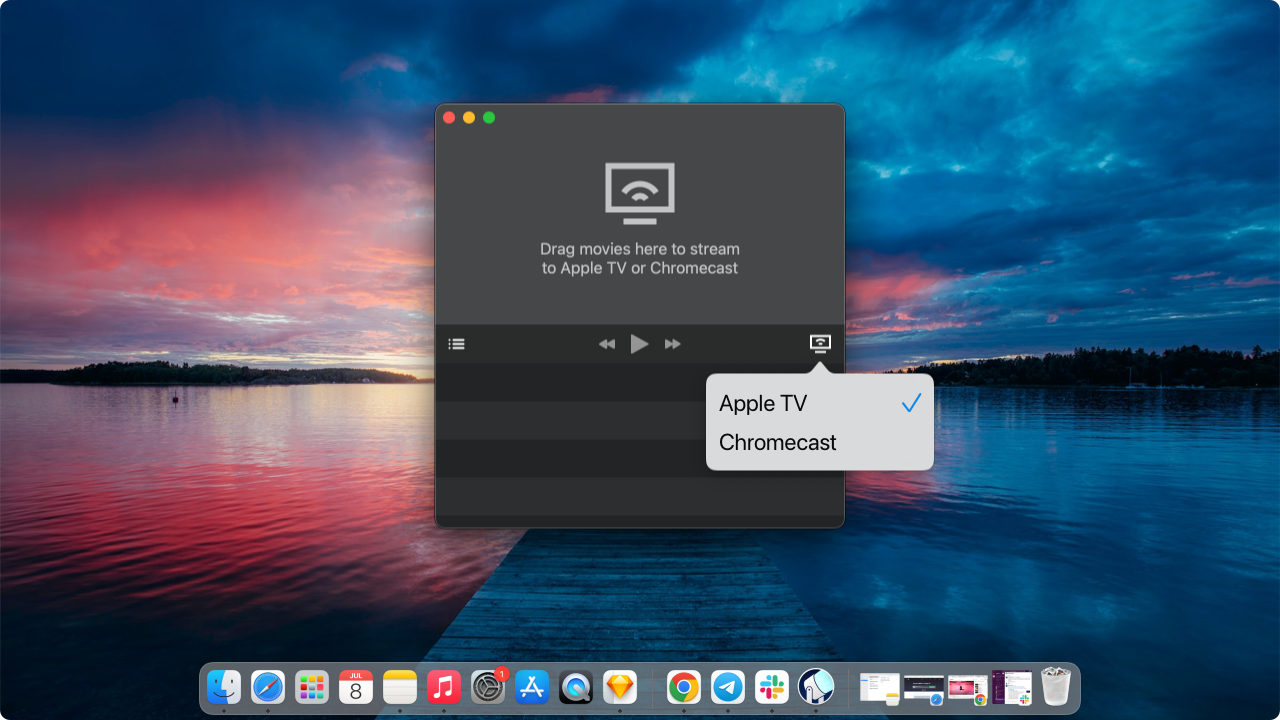
Make sure your Mac and Apple TV share the same Wi-Fi network. Click the device menu in Beamer's lower-right corner and select your Apple TV.

Close unnecessary apps on your Mac before streaming 4K content. This frees up processing power and prevents stuttering during H.265 video playback, especially with large files.
Step 3: Start Streaming
Drag and drop your 4K H.265 files into the Beamer window. Video playback starts in seconds—no waiting, no conversion needed to get Apple TV compatibility.

Why Beamer Beats Conversion Tools
Skip the Wait: Start watching immediately instead of waiting hours for video converter processing to finish.
Keep Your Storage: No duplicate files cluttering your hard drive—stream originals directly without export steps.
Preserve Quality: Maintain original 4K resolution and audio without compression artifacts. Beamer supports high efficiency coding output at full 1080p quality and beyond.
Handle Any Format: Stream multiple incompatible formats in one session without switching between different video converter tools.
Watch and Forget: Beamer automatically manages your queue, removing watched videos without user intervention.
Control from Your Couch: Use your Apple TV remote for everything—pause, rewind, skip to next video. The high bitrate streaming maintains quality across all supported video coding formats.
Include Subtitles: Beamer detects and streams subtitle files automatically, supporting videos on Apple TV with full subtitle integration.
Take advantage of Beamer's automatic cleanup feature to avoid manually managing your streaming queue. The app handles file organization so you can focus on watching.
You can also play WMV on Apple TV and watch MKV format files using the same simple process. If you want to go beyond streaming and actually add movies to your Apple TV library, we’ve got you covered in a dedicated guide. This solution works across different Apple TV gen models, making it versatile for various setups.
Real-World Performance
Beamer maintains original video quality while streaming, so your 4K HEVC on Apple TV files look exactly as intended. Users report smooth playback without the stuttering or pixelation common with converted files. The app handles everything from SD videos to 4K HDR videos whenever you want to watch them.
The queue system works particularly well for binge-watching—line up several movies and control everything from your couch. Things you should know: Beamer works reliably across different network conditions and doesn't require a browser interface like some streaming solutions.
FAQ
How can I play 4K H.265/HEVC files on my Apple TV?
To play 4K H.265/HEVC files on your Apple TV, you need to convert them to an Apple-supported format. A third-party tool like Beamer eliminates the need for complex conversions by seamlessly streaming unsupported formats, including H.265/HEVC, to your Apple TV.
Does Apple TV support 4K H.265/HEVC files?
Apple TV 4K supports H.265/HEVC video up to 2160p with a frame rate of 60 fps. However, issues may arise if your 4K file is encoded with unsupported codecs or audio formats. In such cases, using Beamer allows you to stream these files without compatibility problems.
What is the best way to stream 4K H.265/HEVC on Apple TV?
The best way to stream 4K H.265/HEVC on Apple TV is to use Beamer. It does not require lengthy conversion processes and lets you stream various formats directly from your Mac to Apple TV. You simply drag and drop your files, and Beamer handles the rest, offering smooth playback.
Can I stream unsupported video formats on Apple TV?
Yes, you can stream unsupported video formats on Apple TV using Beamer. It supports various video formats, such as MKV, AVI, WMV, and more, ensuring you can watch your favorite content without worrying about Apple TV’s native format limitations.
How do I stream videos with subtitles on Apple TV?
With Beamer, streaming videos with subtitles on Apple TV is straightforward. The app automatically detects and adds embedded or associated subtitle files like SubRip and MPL(2). Once you’ve added the video, the subtitles are included in the playback without additional steps.
What if my Apple TV or iOS device isn’t responding during playback?
In rare cases, you may need to reset your iPhone or iPad connected to the system. Here’s a step-by-step guide on how to put iPhone/iPad into DFU mode if troubleshooting requires it.

