How to Transfer Files from iPhone to PC without iTunes


Transferring files from your iPhone to a PC is essential for backing up data, freeing up storage, or simply working across devices. Whether you want to transfer data wirelessly or via USB, several methods make the process quick and seamless. This guide explores the best ways to send files from iPhone to PC without losing quality or speed.
Why Transfer Files from iPhone to PC?
There are several reasons why you might want to transfer files from an iPhone to a computer:
Backup important data – Keep your photos, videos, and documents safe.
Free up storage – iPhones have limited storage, and transferring files can help you manage space.
Edit or share files – Easily edit large documents, audio files, or videos on your PC.
Transfer contacts and media – Quickly move essential files between devices.
Regardless of the reason, choosing the right method is key to ensuring a smooth transfer process.
Best Methods to Transfer Files from iPhone to PC
1. Using AirDrop (for Mac Users)
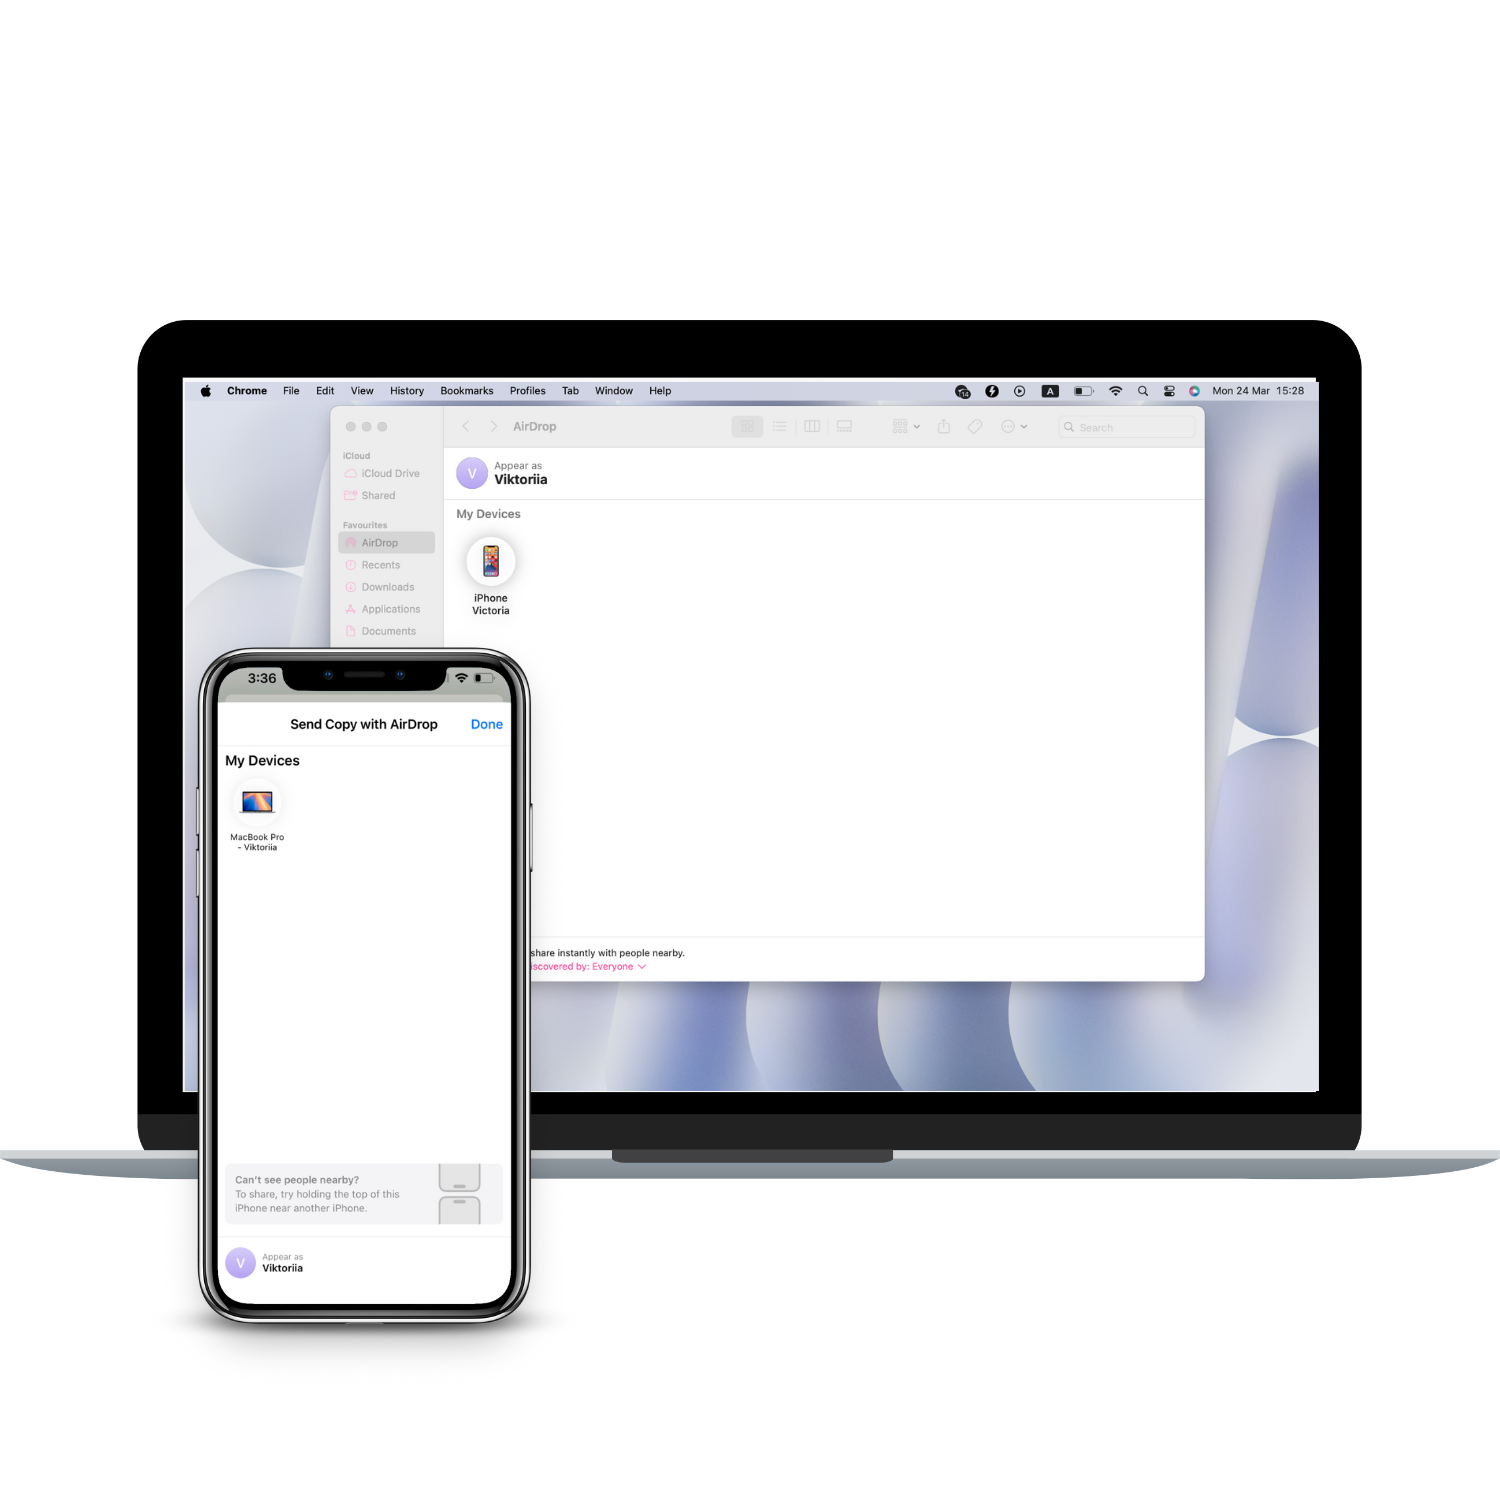
Many iPhone users prefer built-in solutions over third-party software. If you’re looking for a fast, wireless, and hassle-free way to transfer files to your Mac, AirDrop is your best option.
AirDrop works only between Apple devices, so it isn’t available for Windows PCs.
Step 1: Enable AirDrop on iPhone & Mac
First, ensure that your Mac supports AirDrop. To check:
- Click Go on the top menu bar of your Mac.
- Select AirDrop from the dropdown menu.
- Set your visibility to 'Everyone' in the AirDrop window for a smoother connection.
If AirDrop is not available, your Mac may be too old to support this feature.
On iPhone, AirDrop is enabled by default. However, to check or change its settings:
- Open Settings > General > AirDrop.
- Set it to 'Everyone' for the best results.
- Alternatively, open Control Center, press and hold the AirDrop icon, and adjust visibility settings.
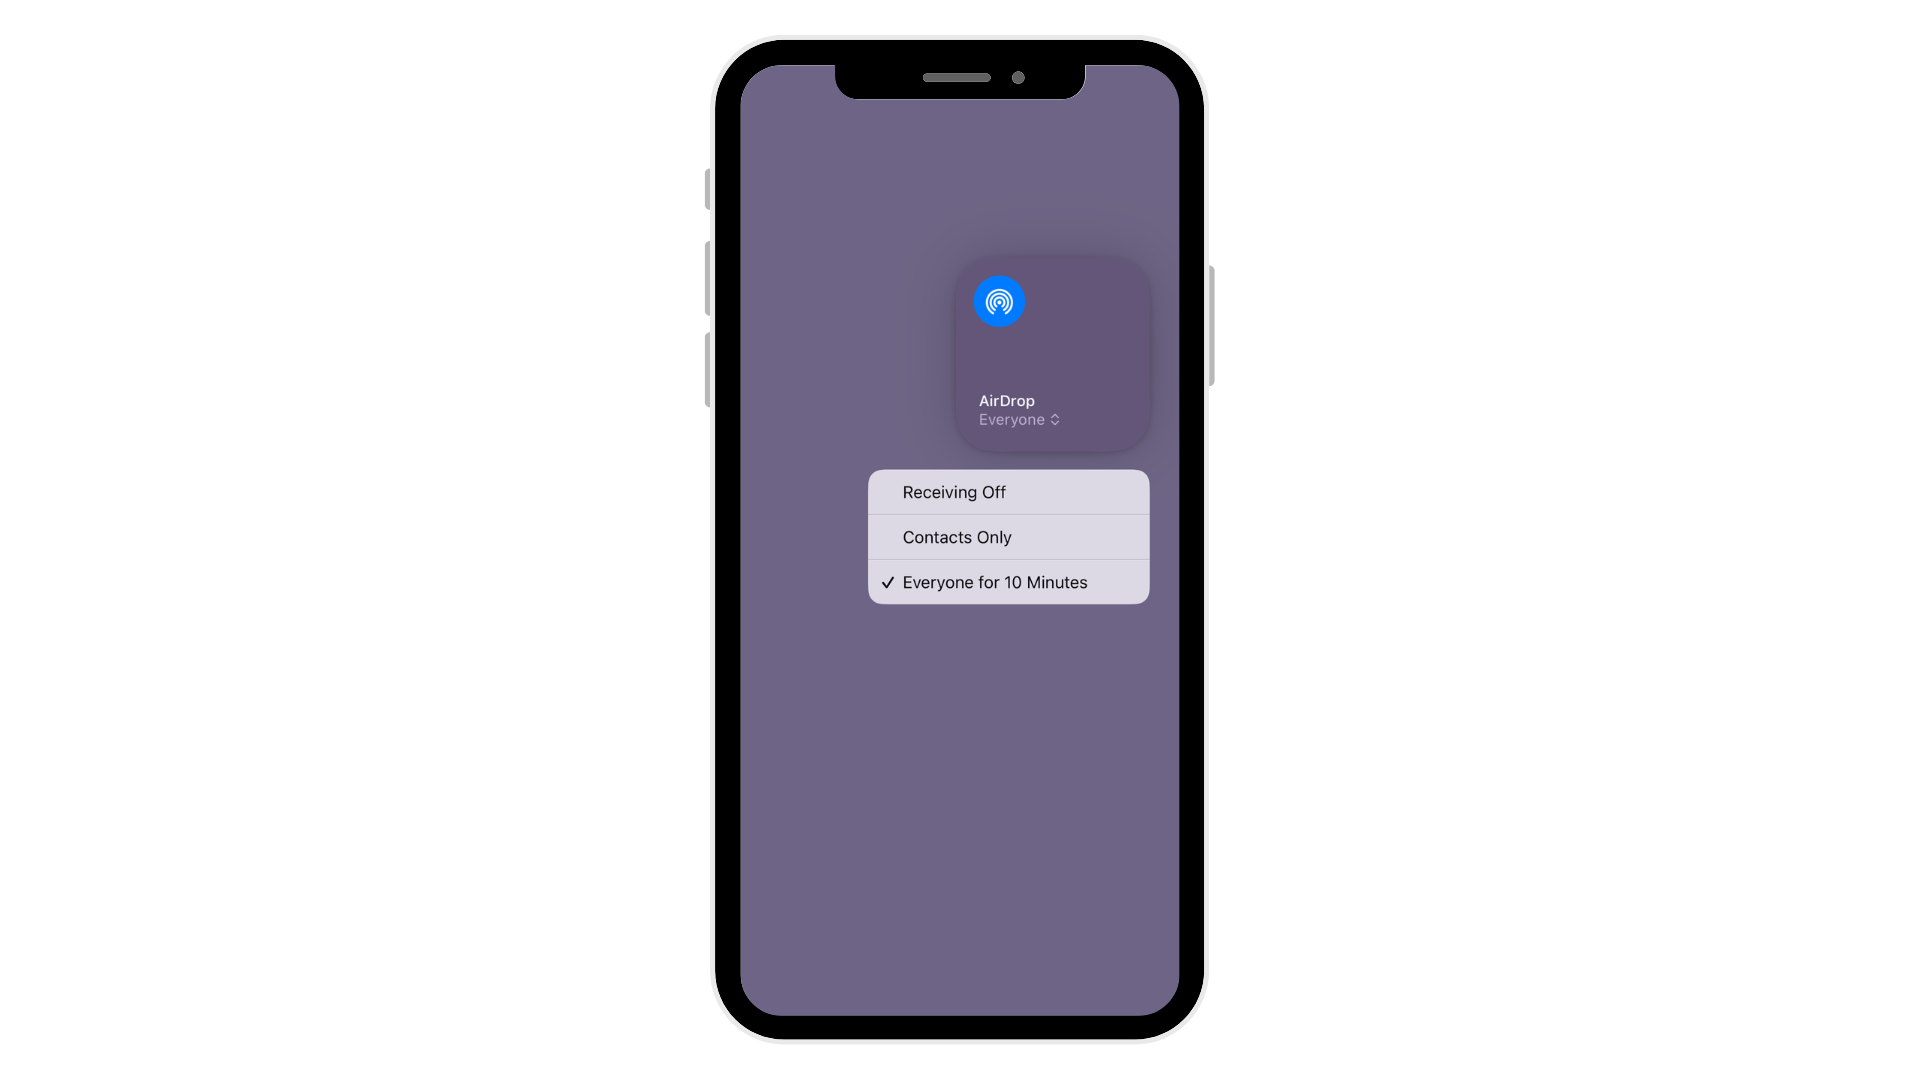
Step 2: Transfer Files with AirDrop
Using AirDrop is effortless:
- Open the file, photo, or document you want to send.
- Tap the Share icon and select AirDrop.
- Choose your Mac (or another Apple device).
- Accept the transfer on your Mac. The file will be saved in the Downloads folder.
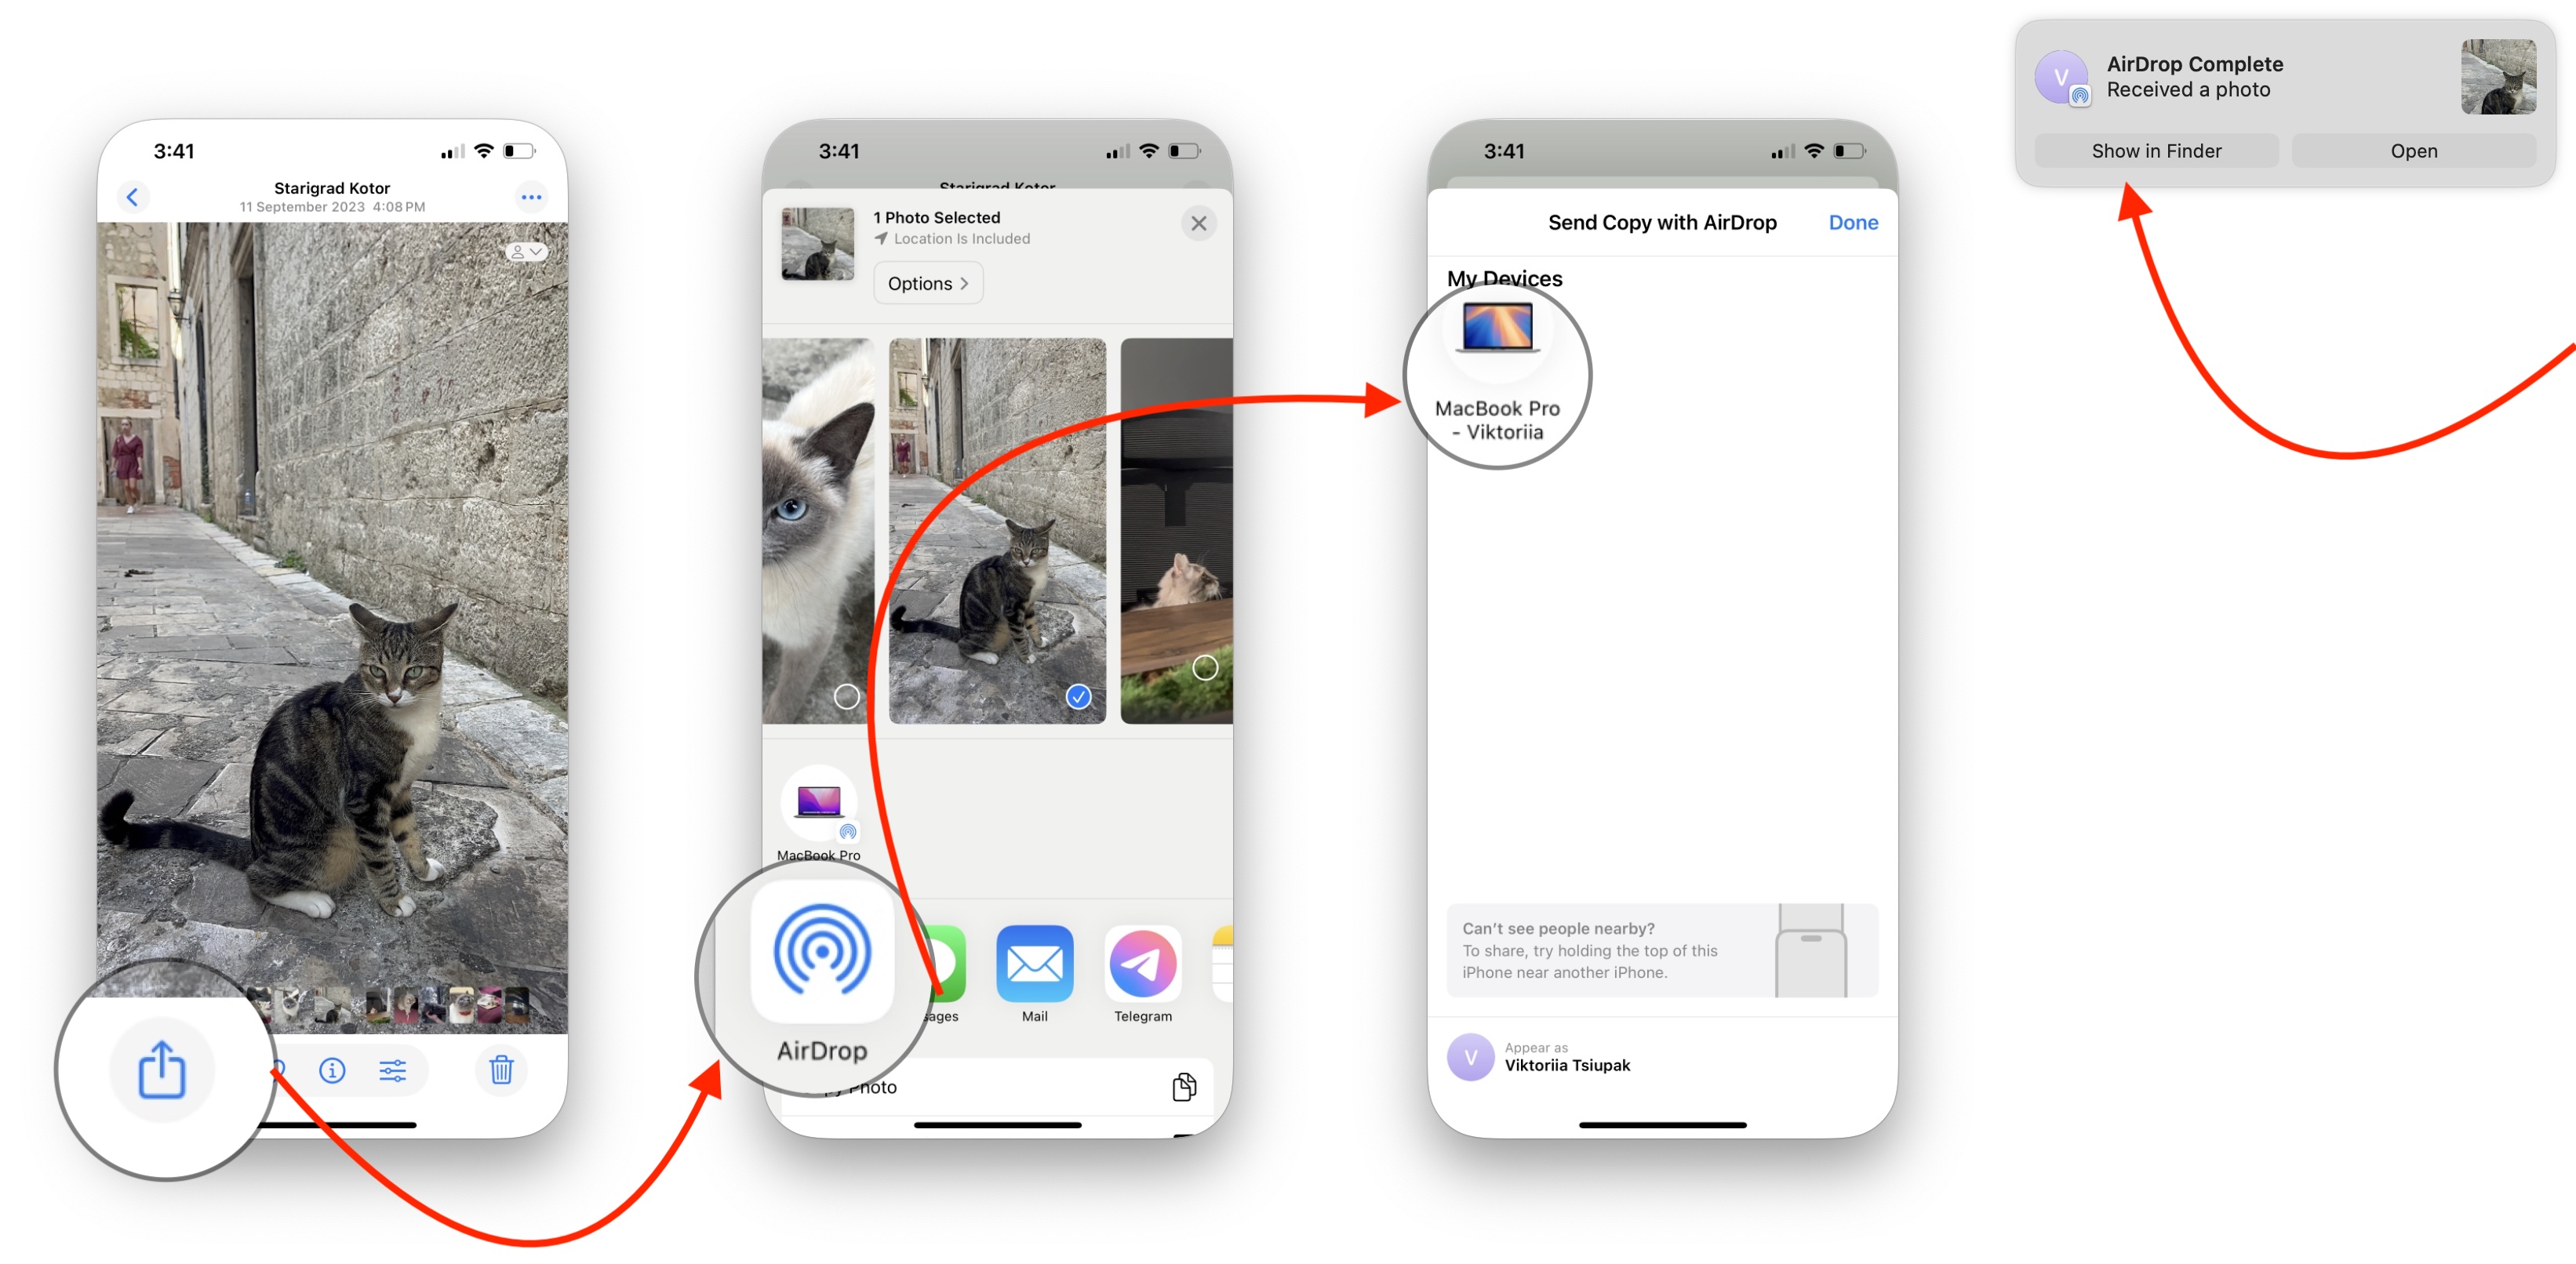
That’s it! Your files will transfer instantly without cables or additional software.
2. Using AltTunes for Fast and Easy Transfers
AltTunes is a powerful file transfer tool that lets you quickly move files from iPhone to PC. Unlike iCloud or AirDrop, AltTunes works both wirelessly and via USB, ensuring fast and reliable transfers for all file types.
How to Use AltTunes to Transfer Files
Step 1: Download and Install AltTunes
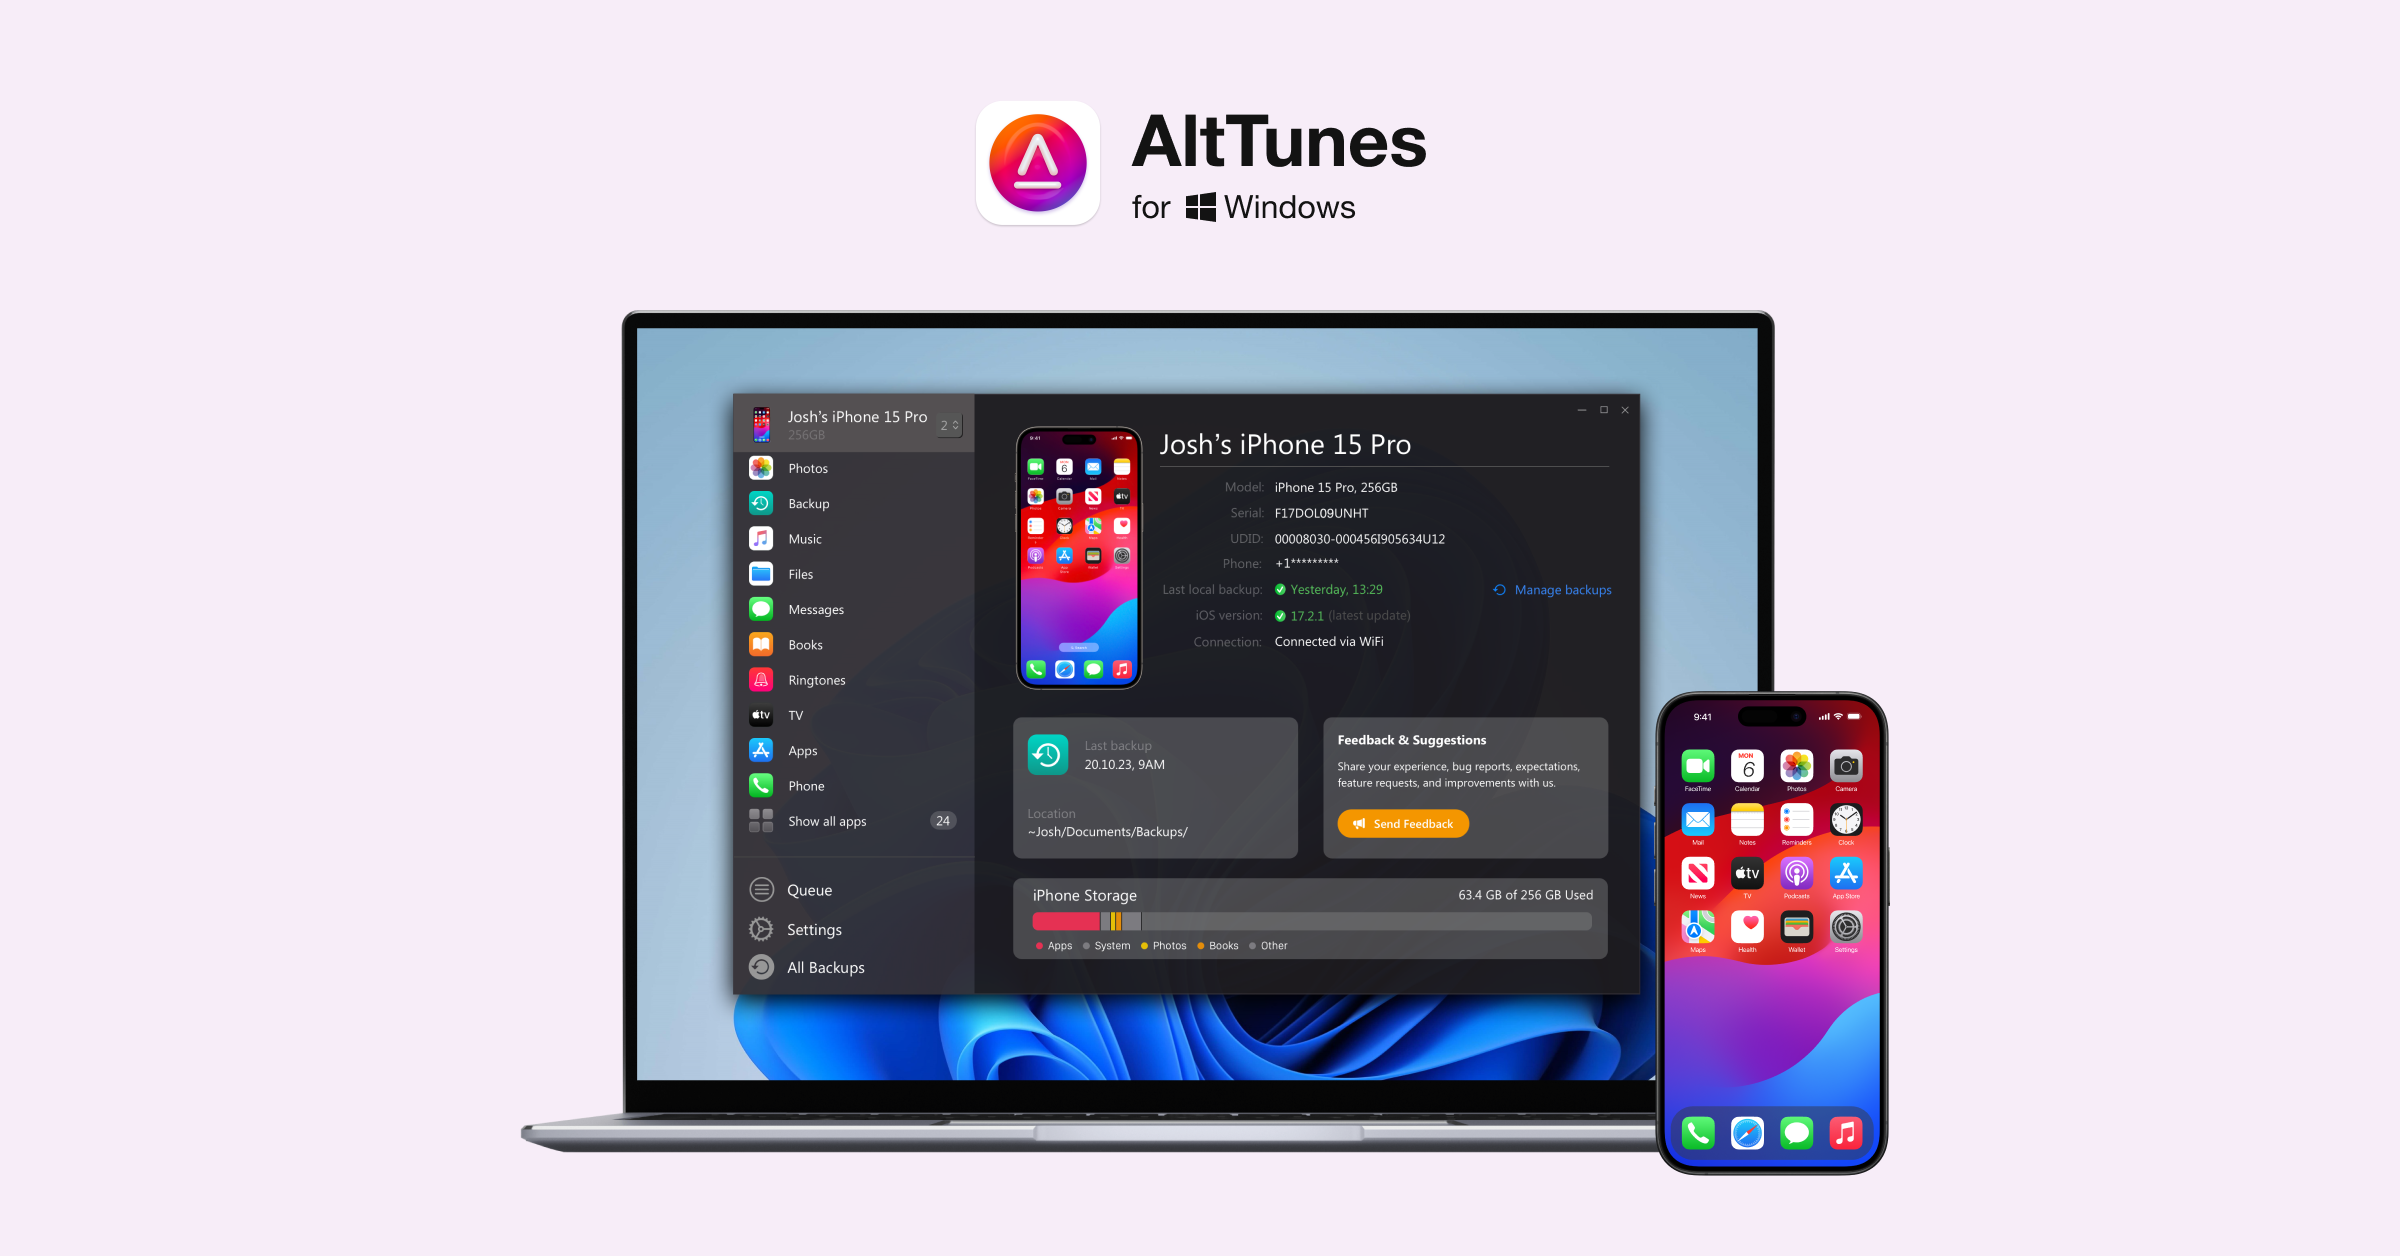
First, download the latest version of AltTunes from Softorino’s official website or by clicking the button below. Once the download is complete, follow the on-screen instructions to install the software, just like any other application.
Step 2: Connect your iPhone
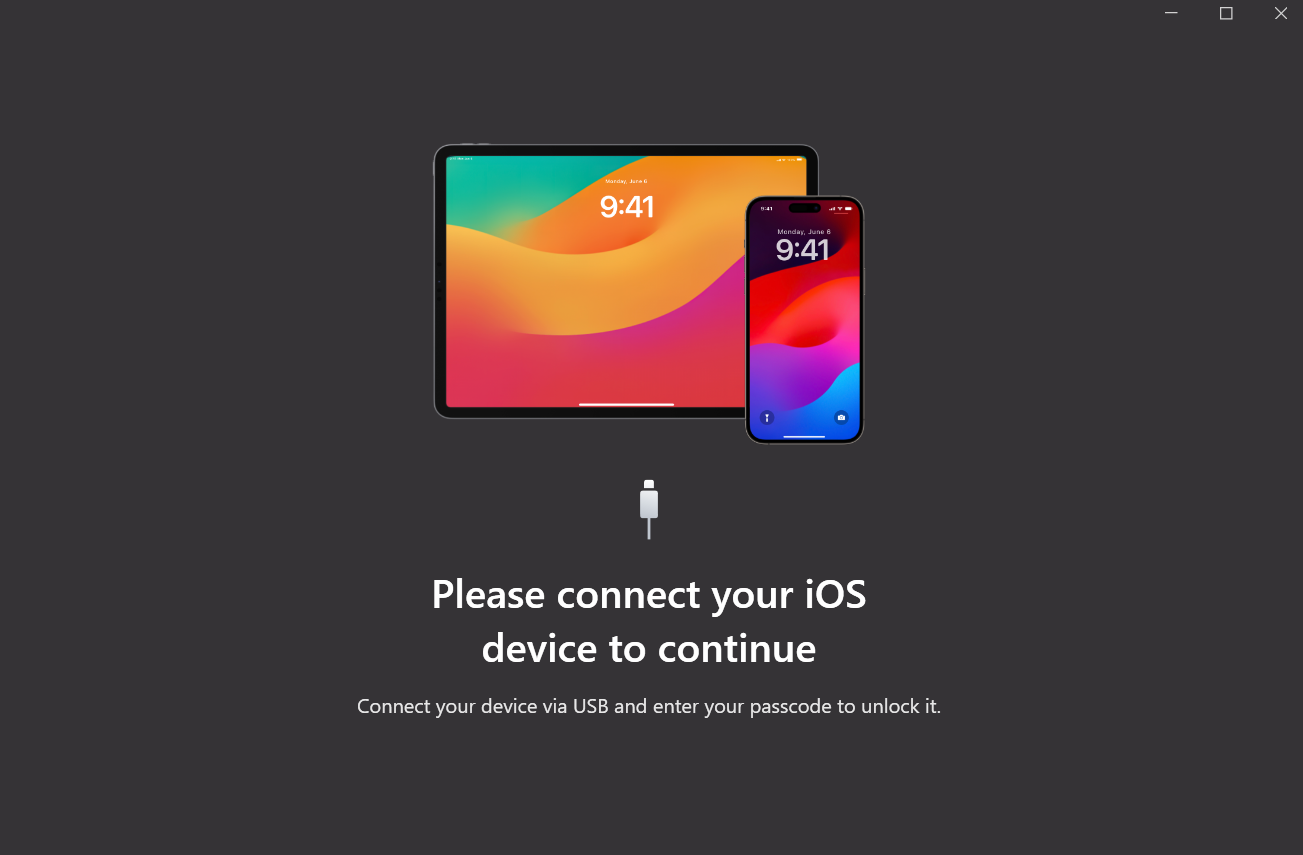
After installation, launch AltTunes and connect your iPhone to your PC using a USB cable. The software will automatically detect your device.
If this is your first time connecting, your iPhone may prompt you to 'Trust This Computer.' Tap Trust and enter your passcode to proceed.
Good to know: AltTunes works with both iPhones and iPads, treating all Apple devices equally. So, if you have an iPad, you can connect it the same way!
If you experience connection issues, don’t worry—we’ve got you covered. Click the link below for troubleshooting tips.
Click here to solve connection issues!
Step 3: Explore Your Options
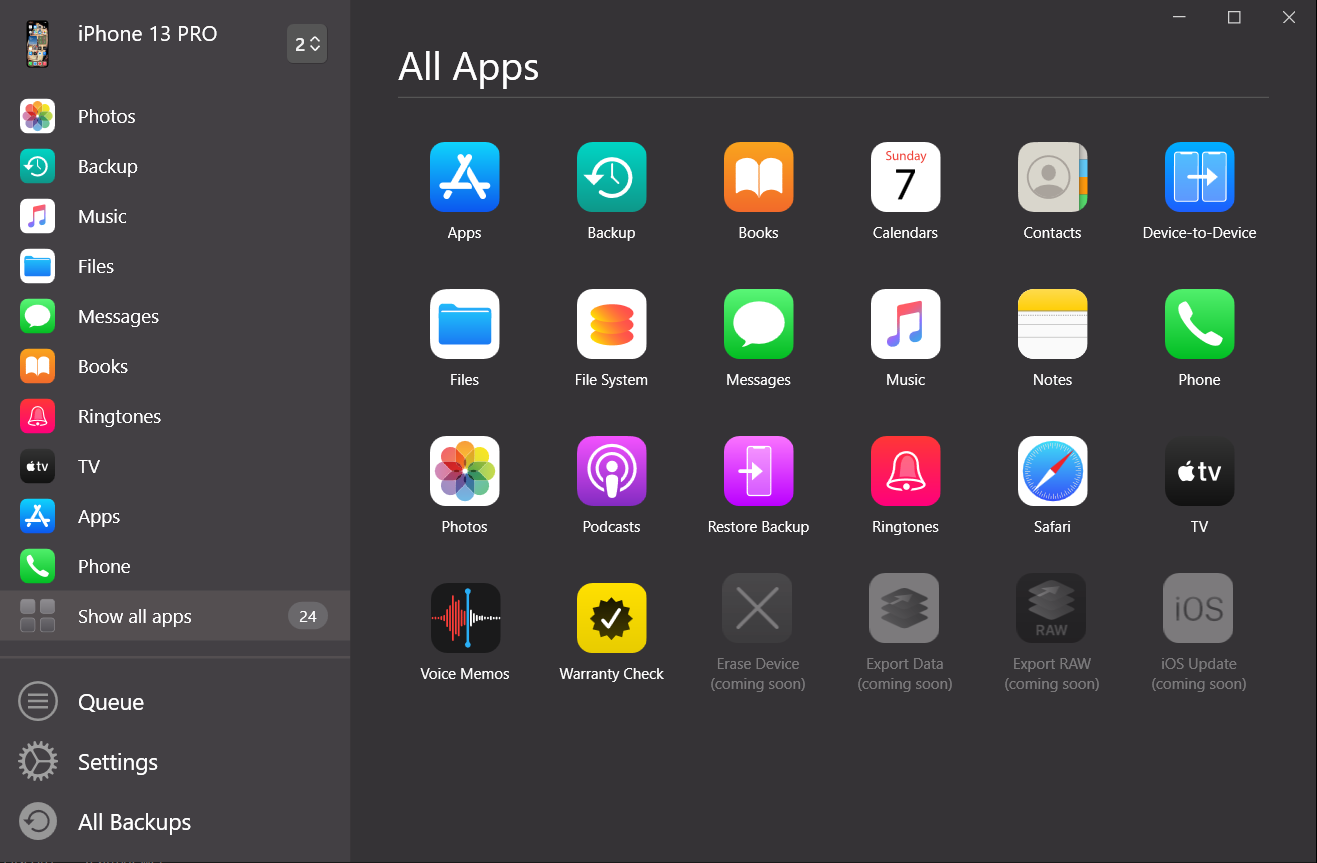
You’re all set! Now, AltTunes gives you complete control over your files. Use the left-side menu to navigate through different file types and choose whether to import, export, back up, or organize your data.
With AltTunes, you can select specific files to transfer—perfect for moving only the media you need. If you’re looking for a full device backup, the built-in Backup Wizard lets you backup your iPhone without relying on iCloud, while also allowing you to browse your backup before restoring.
Step 4: Start the Backup Wizard
Backing up your iPhone with AltTunes is just like transferring all your data to a PC—but with more flexibility. Unlike Apple’s built-in backup system, AltTunes lets you view and manage your backup files before restoring them.
To begin, click on your device in the top-left corner of the app. Then, select 'Backup' on the right side to launch the Backup Wizard.
Step 5: Launch the backup
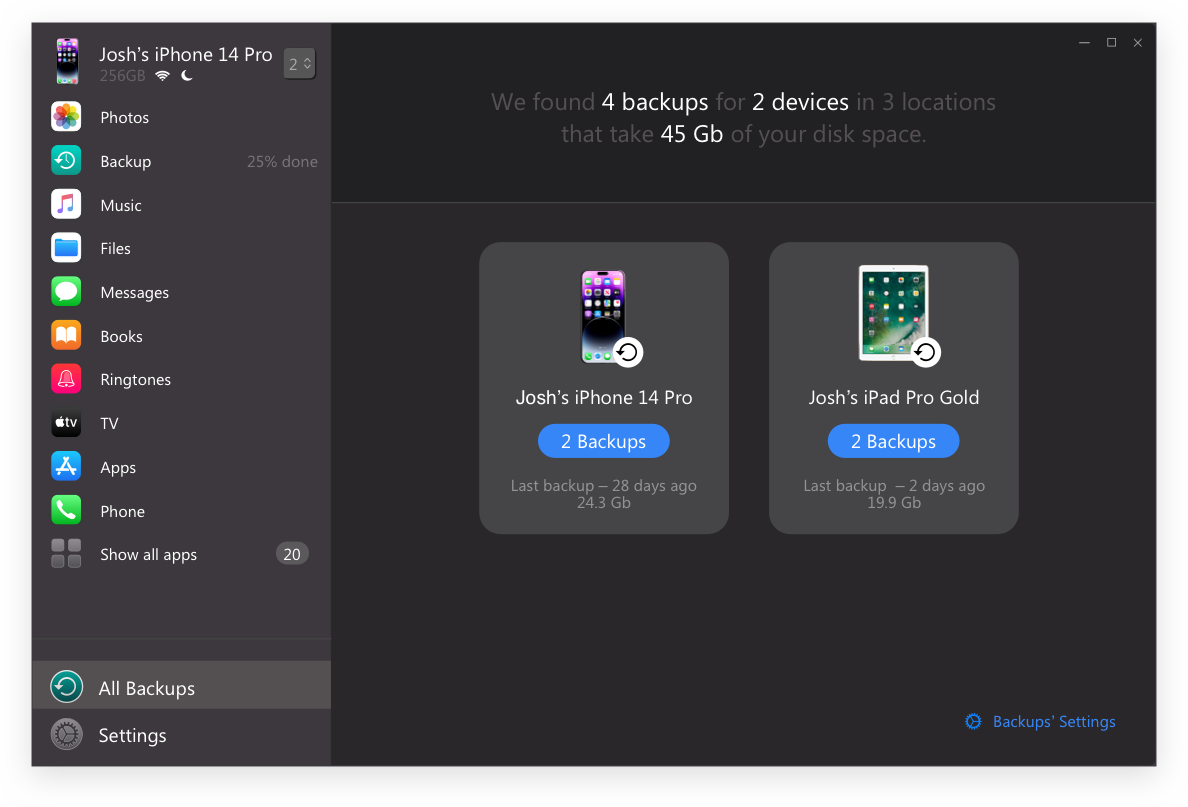
Once the Backup Wizard is open, you can personalize your backup settings. Choose options like encryption, backup location, or even automatic Wi-Fi backups for added convenience.
When you’re ready, click 'Back Up' to start the process. Make sure both your PC and iPhone are connected to a stable power source to avoid interruptions. A strong Wi-Fi or wired connection will also help speed things up.
Give it a moment—and that’s it! Your backup is complete.
Easy, right?

Now, let’s explore some other ways to simplify file transfers.
Why Choose AltTunes?
Transfers music, photos, videos, contacts, and documents.
Works wirelessly or via USB.
No file size limits or cloud storage restrictions.
One-click backup and restore options.
3. Transferring Files via iCloud Drive
If you prefer a wireless transfer, iCloud Drive is a great option. It allows you to upload files from your iPhone and access them on your PC without using cables.
Steps to Transfer Data Using iCloud Drive:
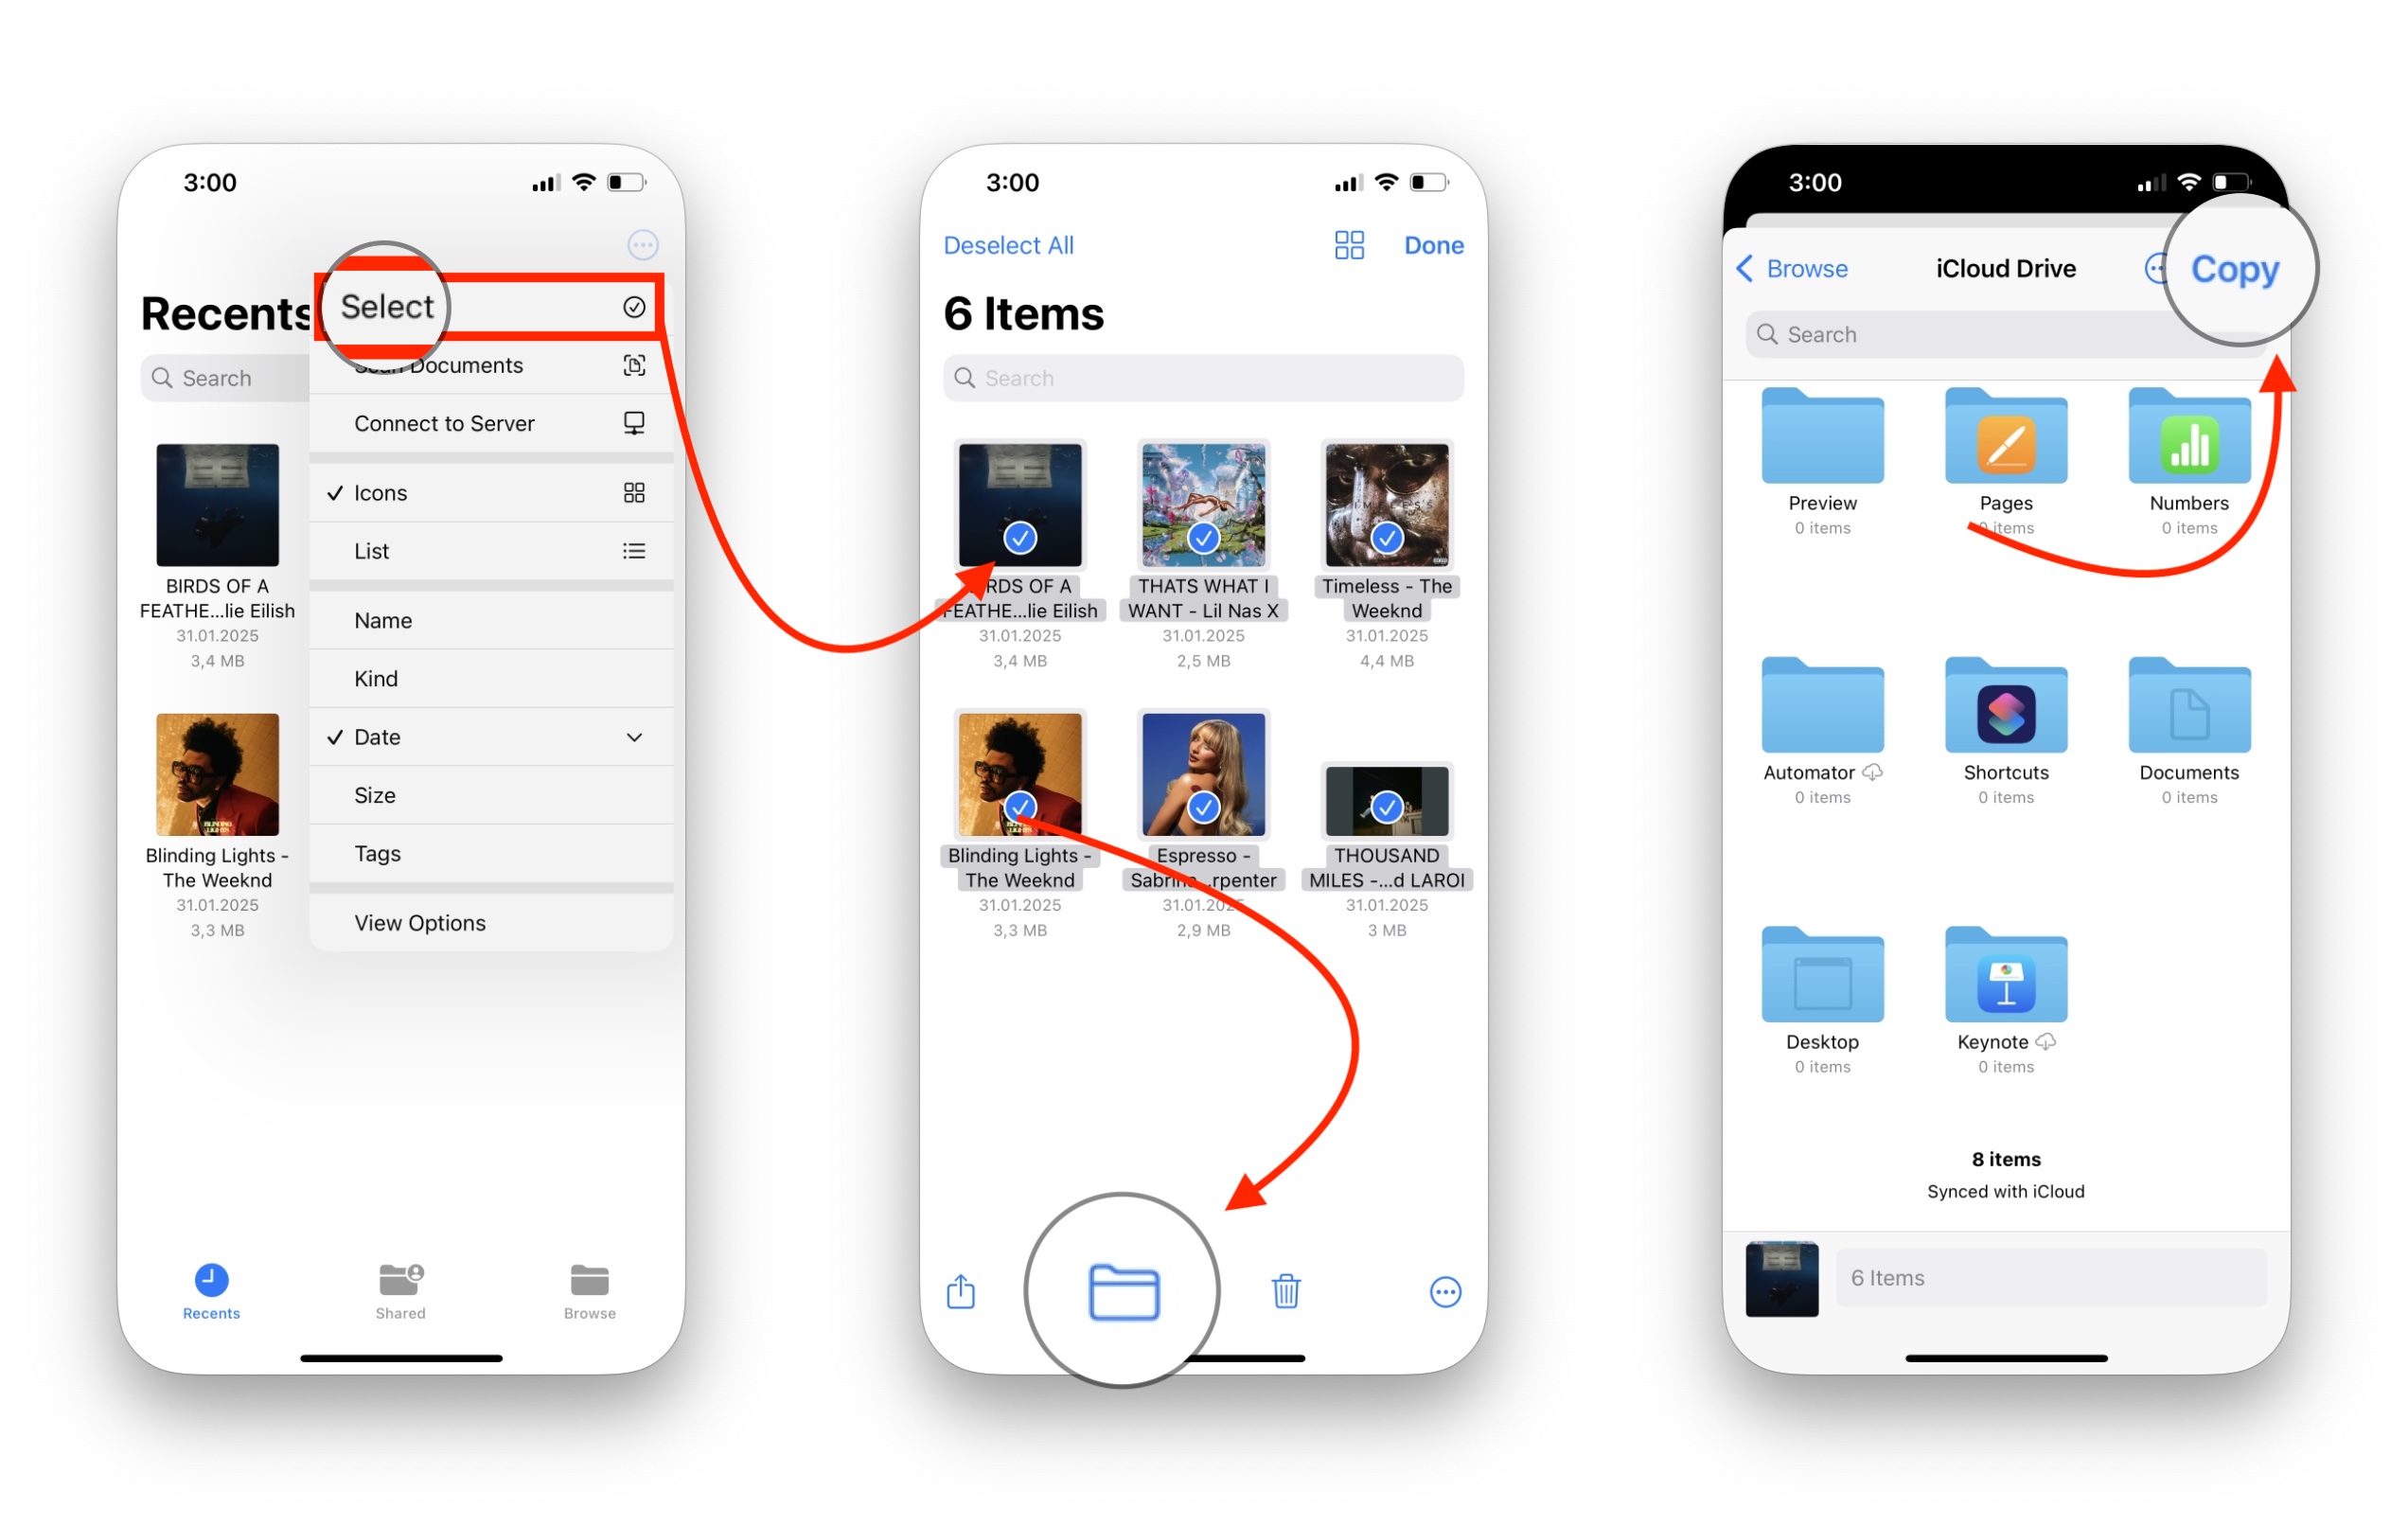
1. Enable iCloud Drive on iPhone: Go to Settings > [Your Name] > iCloud > iCloud Drive, and toggle it on.
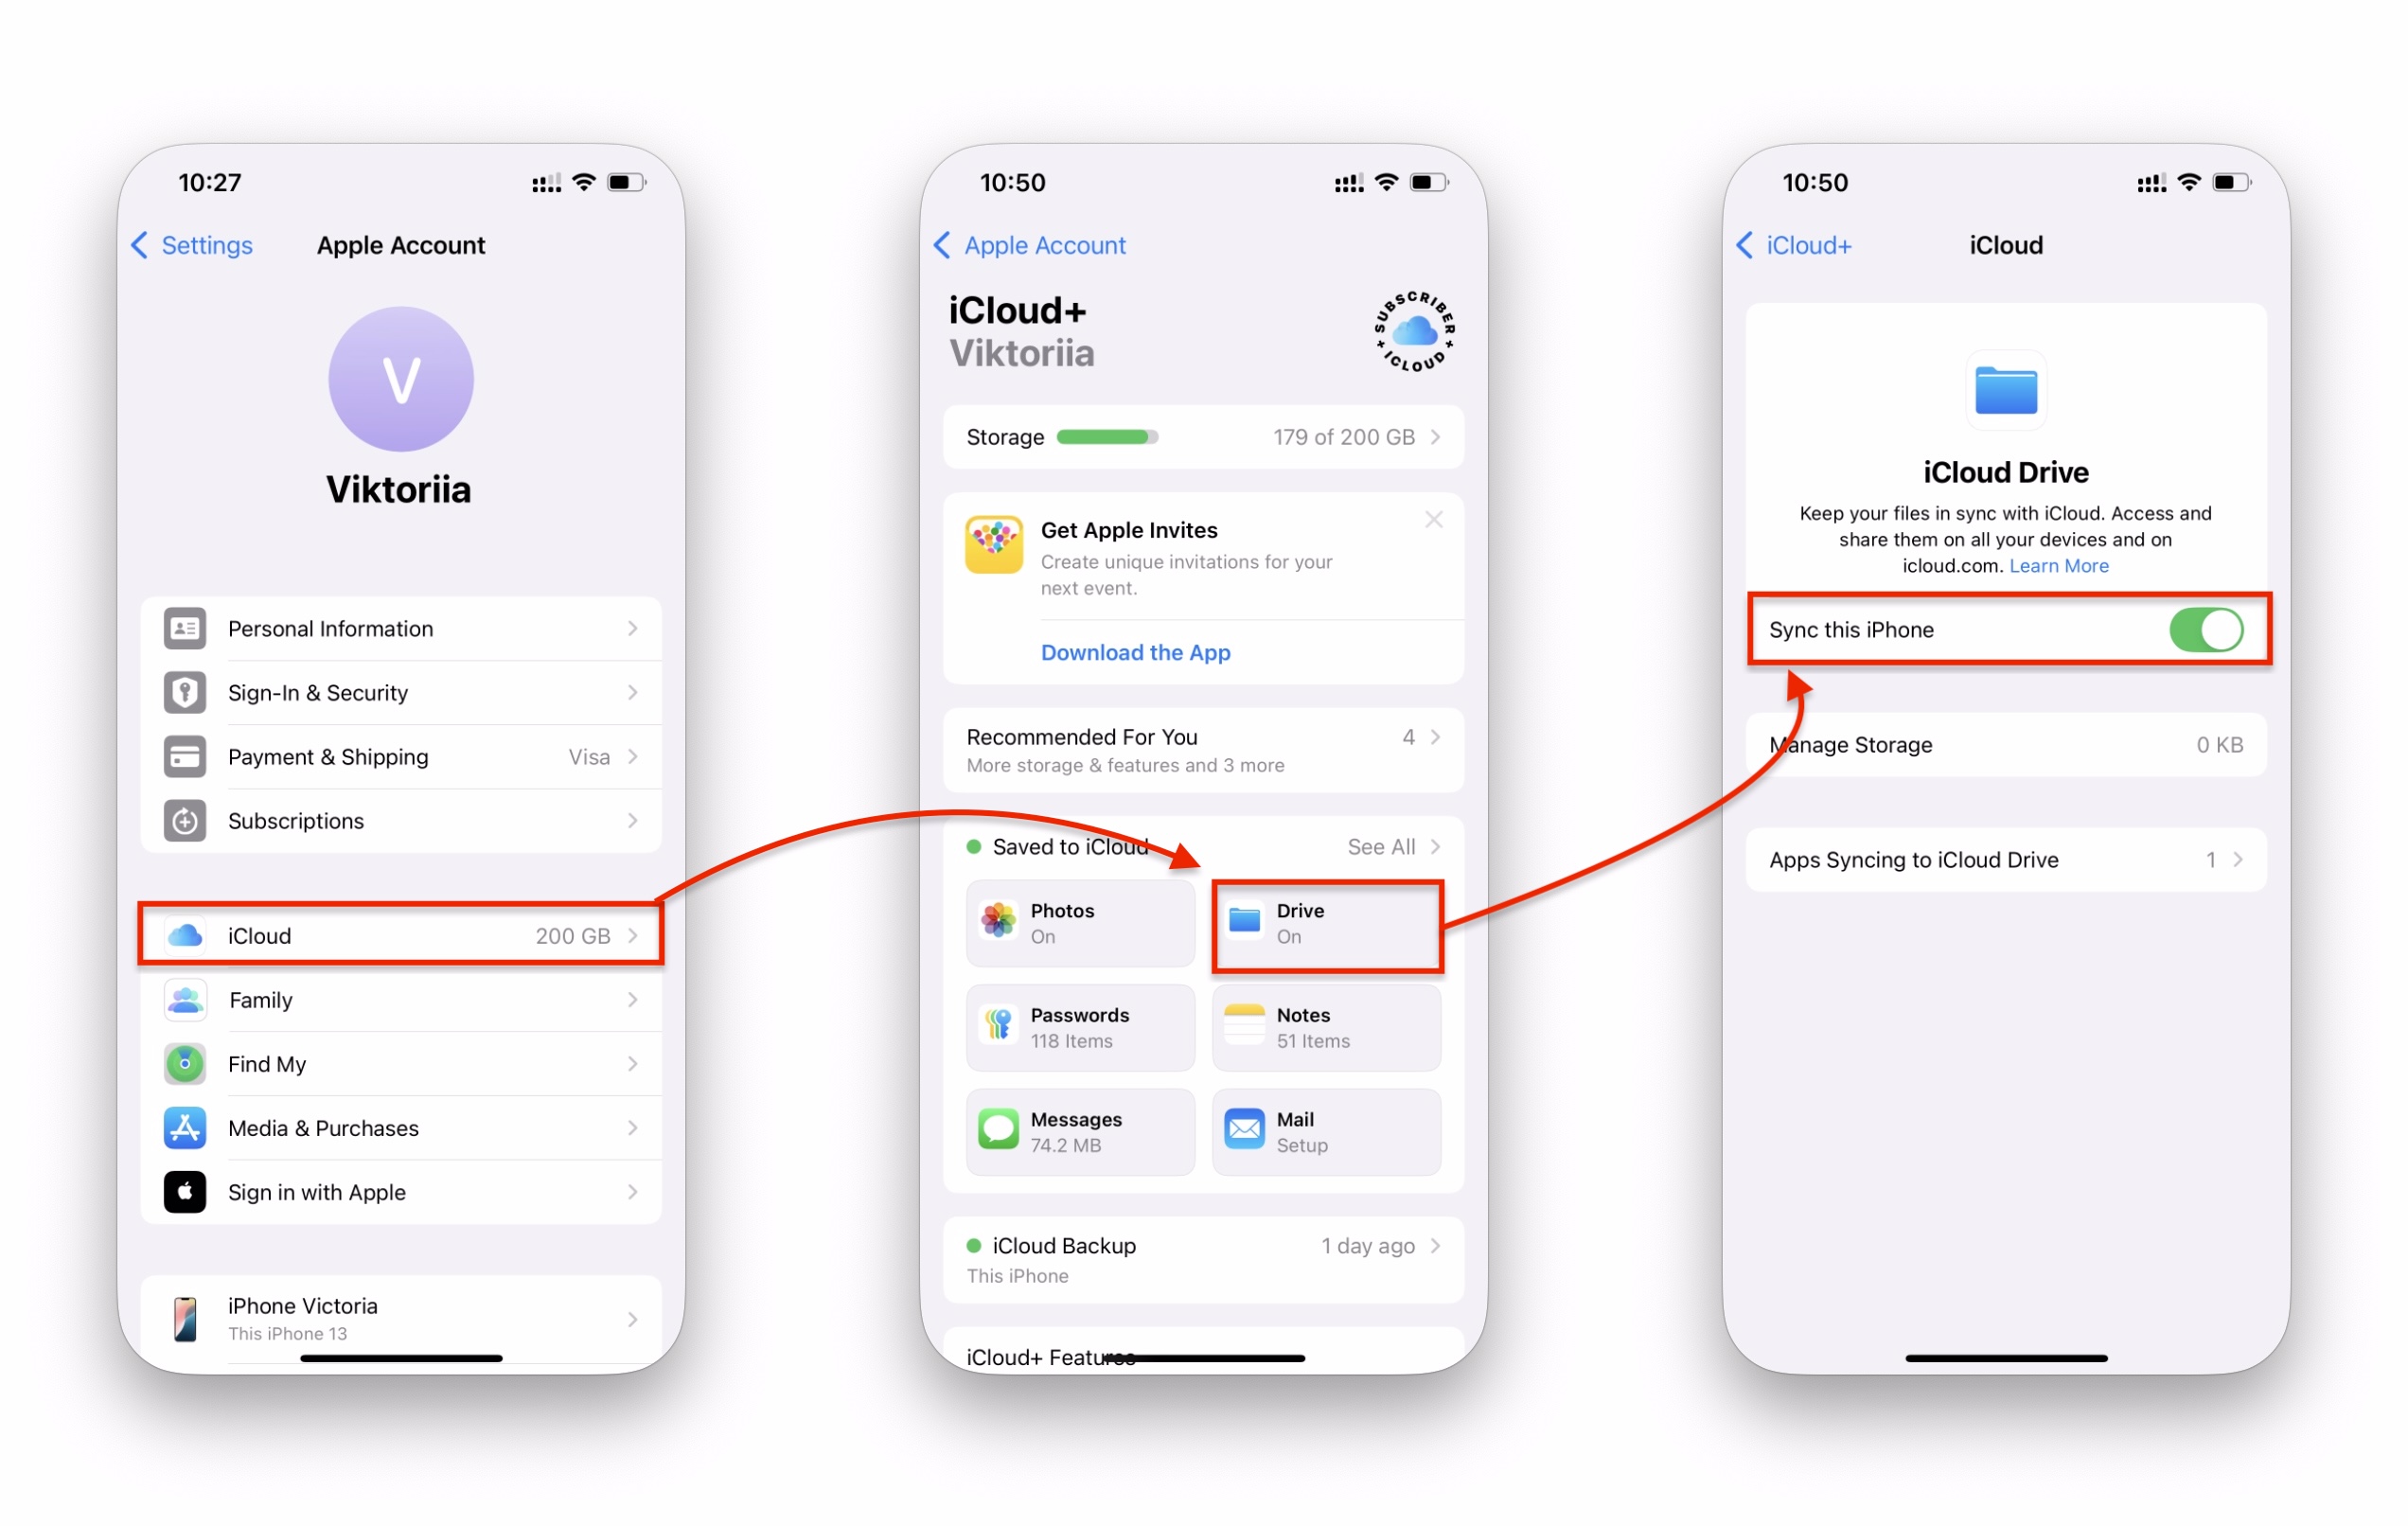
2. Upload Files to iCloud Drive: Open the Files app, select the files you want to transfer, and move them to iCloud Drive
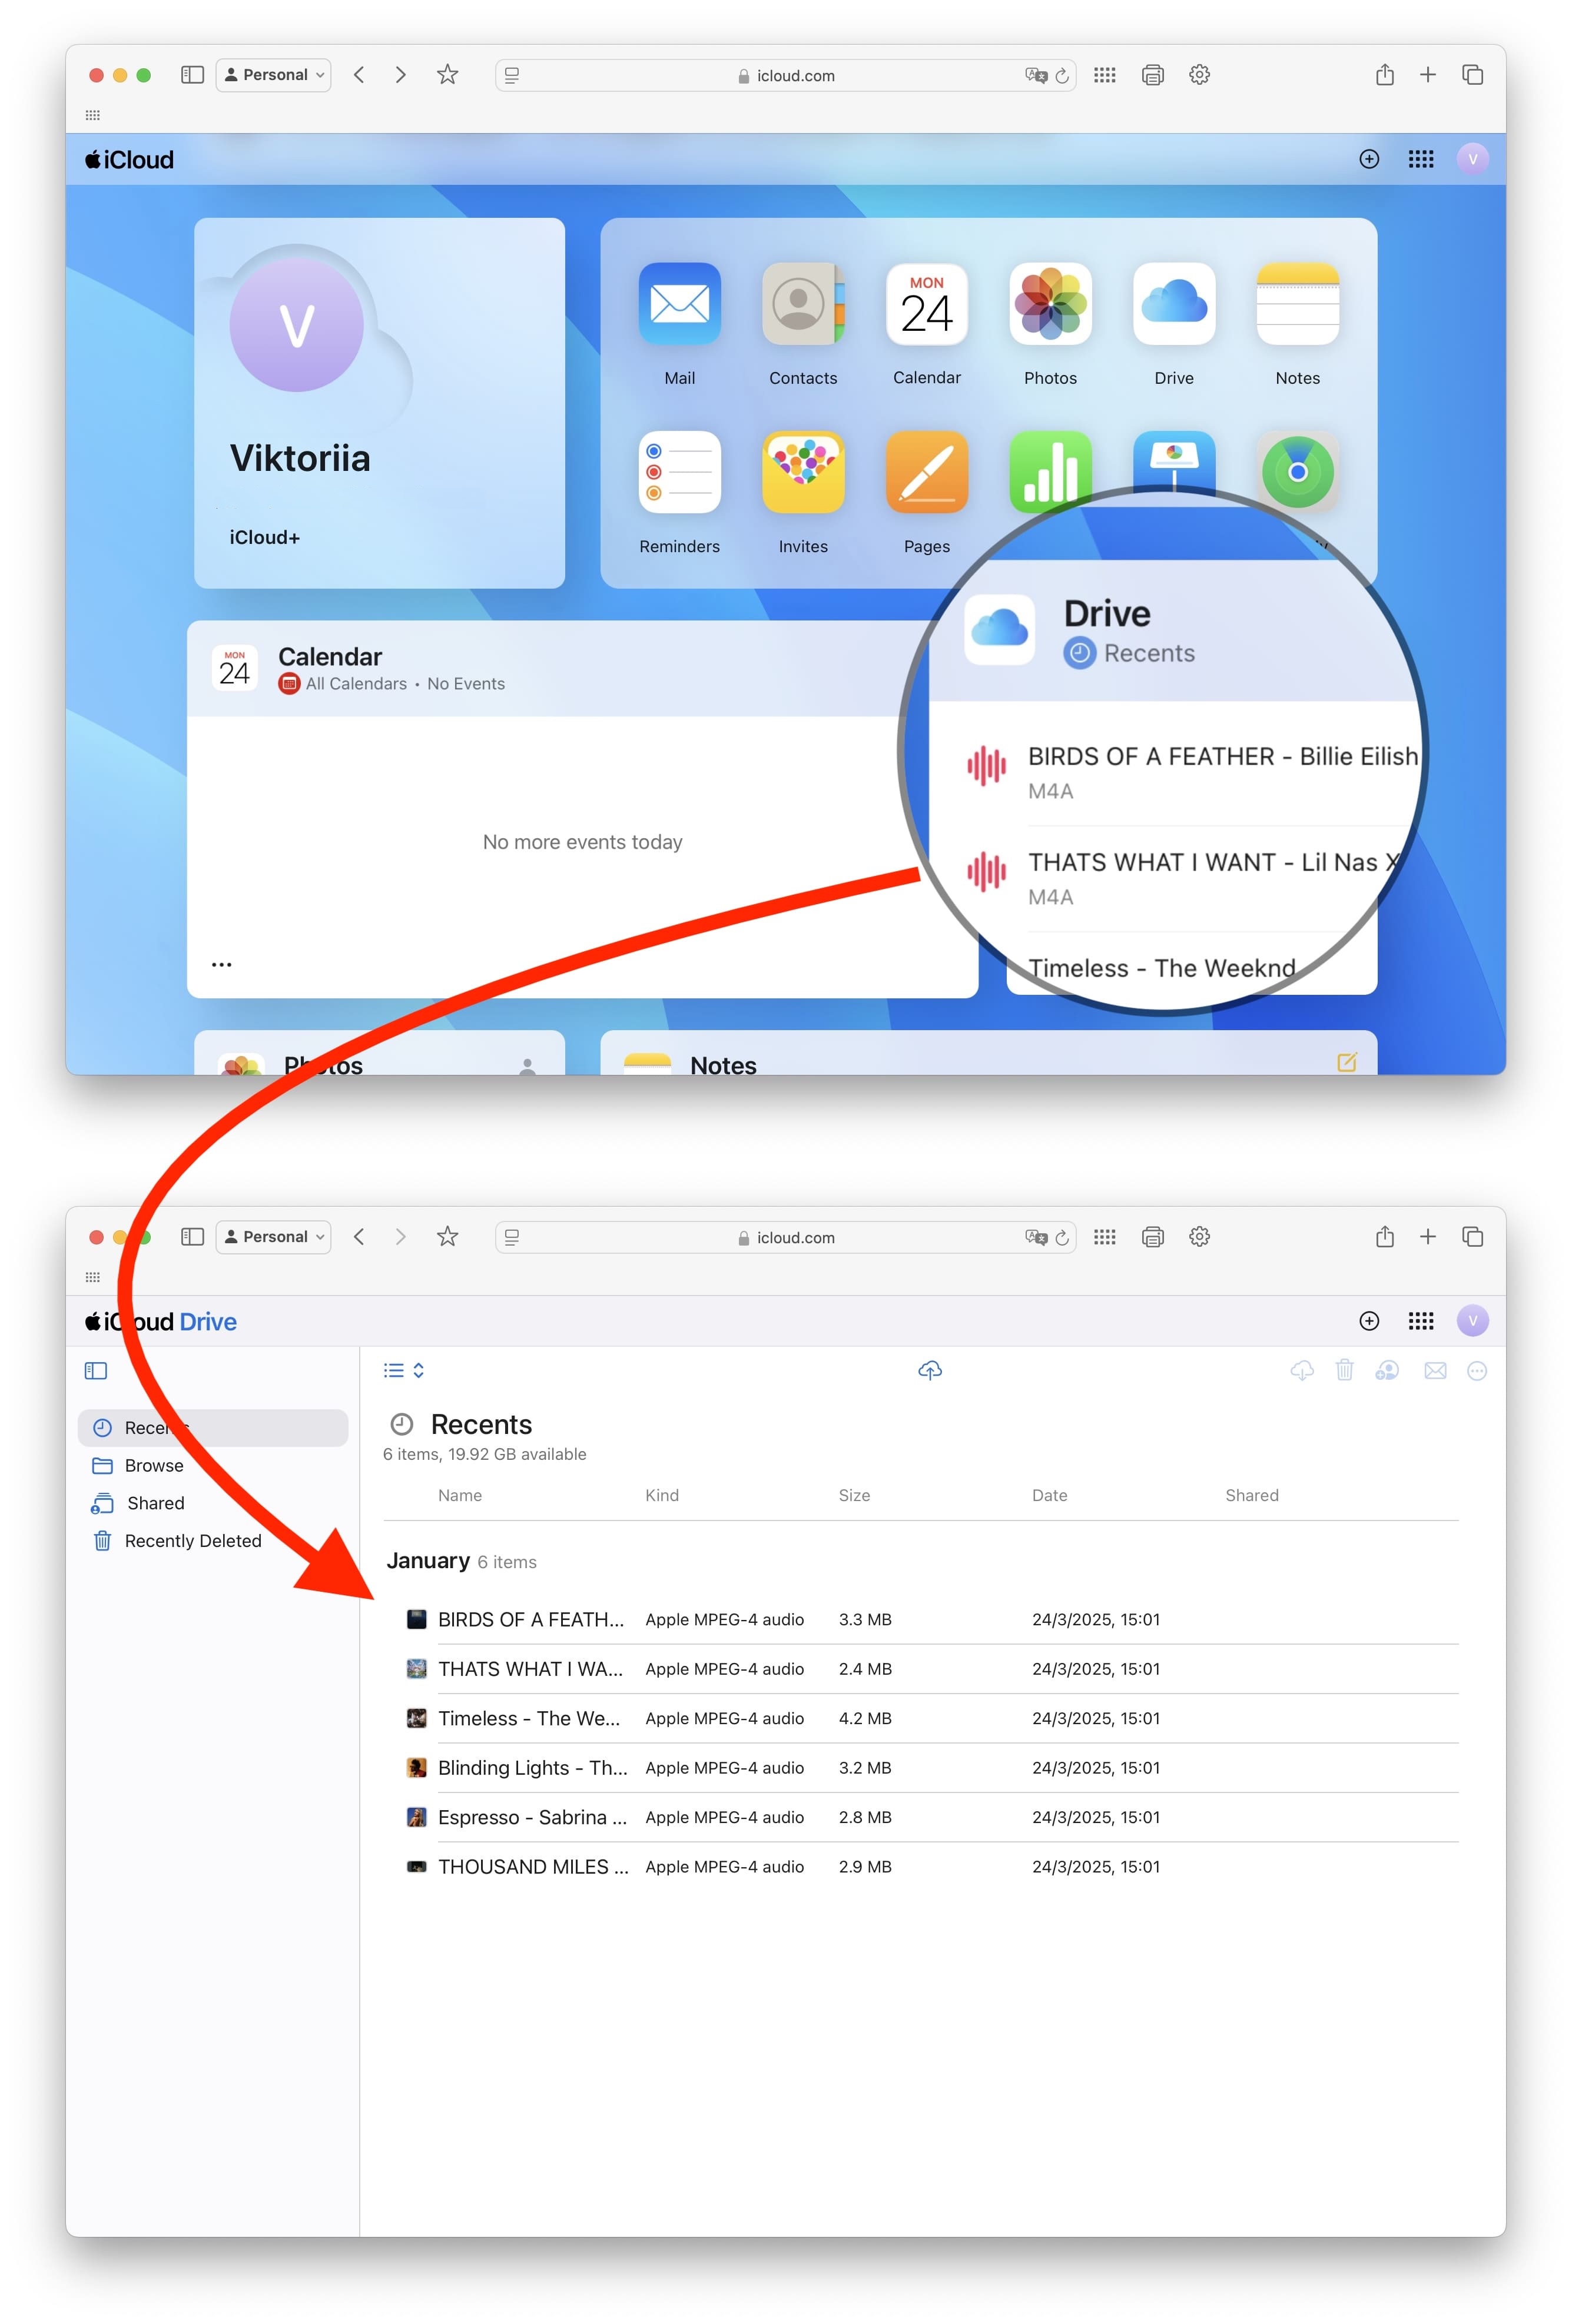
3. Access Files on PC: Visit iCloud.com in your browser or install for Windows to download the files. Sign in with your Apple ID to access your files.
4. Using File Explorer for Photos & Videos
If you need to quickly download the files from an iPhone, such as photos and videos, you can use Windows File Explorer.
Steps to Transfer Photos & Videos Using File Explorer
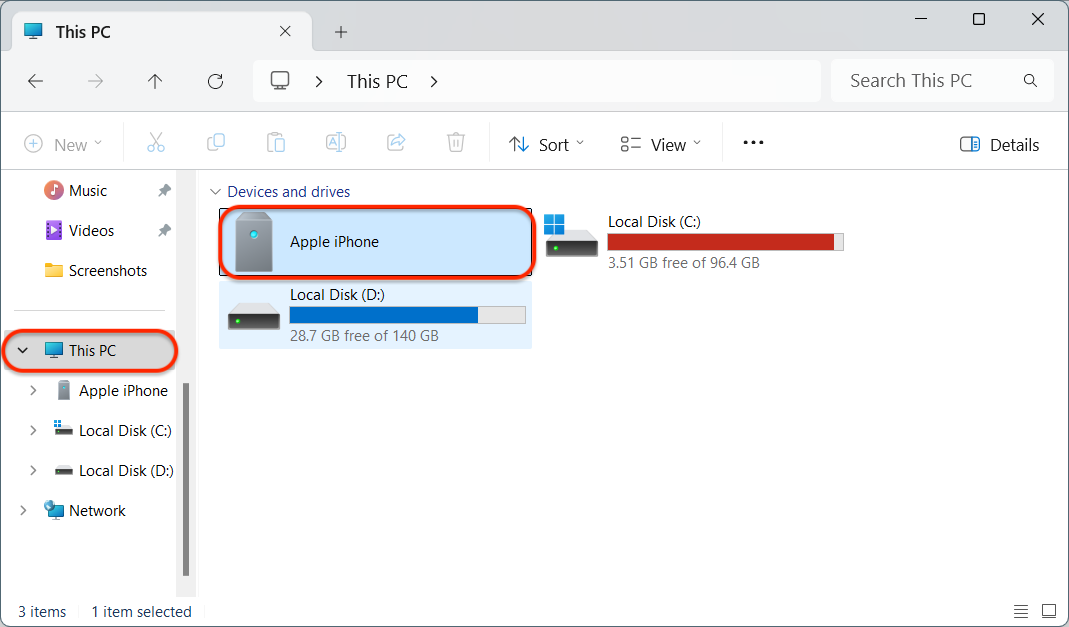
- Connect Your iPhone via USB: Trust the computer when prompted on your iPhone.
- Open File Explorer: Press
Win + Eand navigate to This PC > Apple iPhone. - Locate the Files: Open Internal Storage > DCIM and find your photos/videos.
- Copy Files to PC: Drag the files to your desired folder.
With a little bit of knowledge and experience, you can localize all the different data types faster and faster. This method allows you to transfer photos efficiently while also supporting music transfers and even contacts transfers. Although it has a small learning curve, it's worth mastering to get things done as quickly as possible.
5. Using Google Drive or Dropbox
Cloud storage services like Google Drive and Dropbox let you transfer files from an iPhone to the computer via the internet.
Steps to Transfer Files Using Google Drive
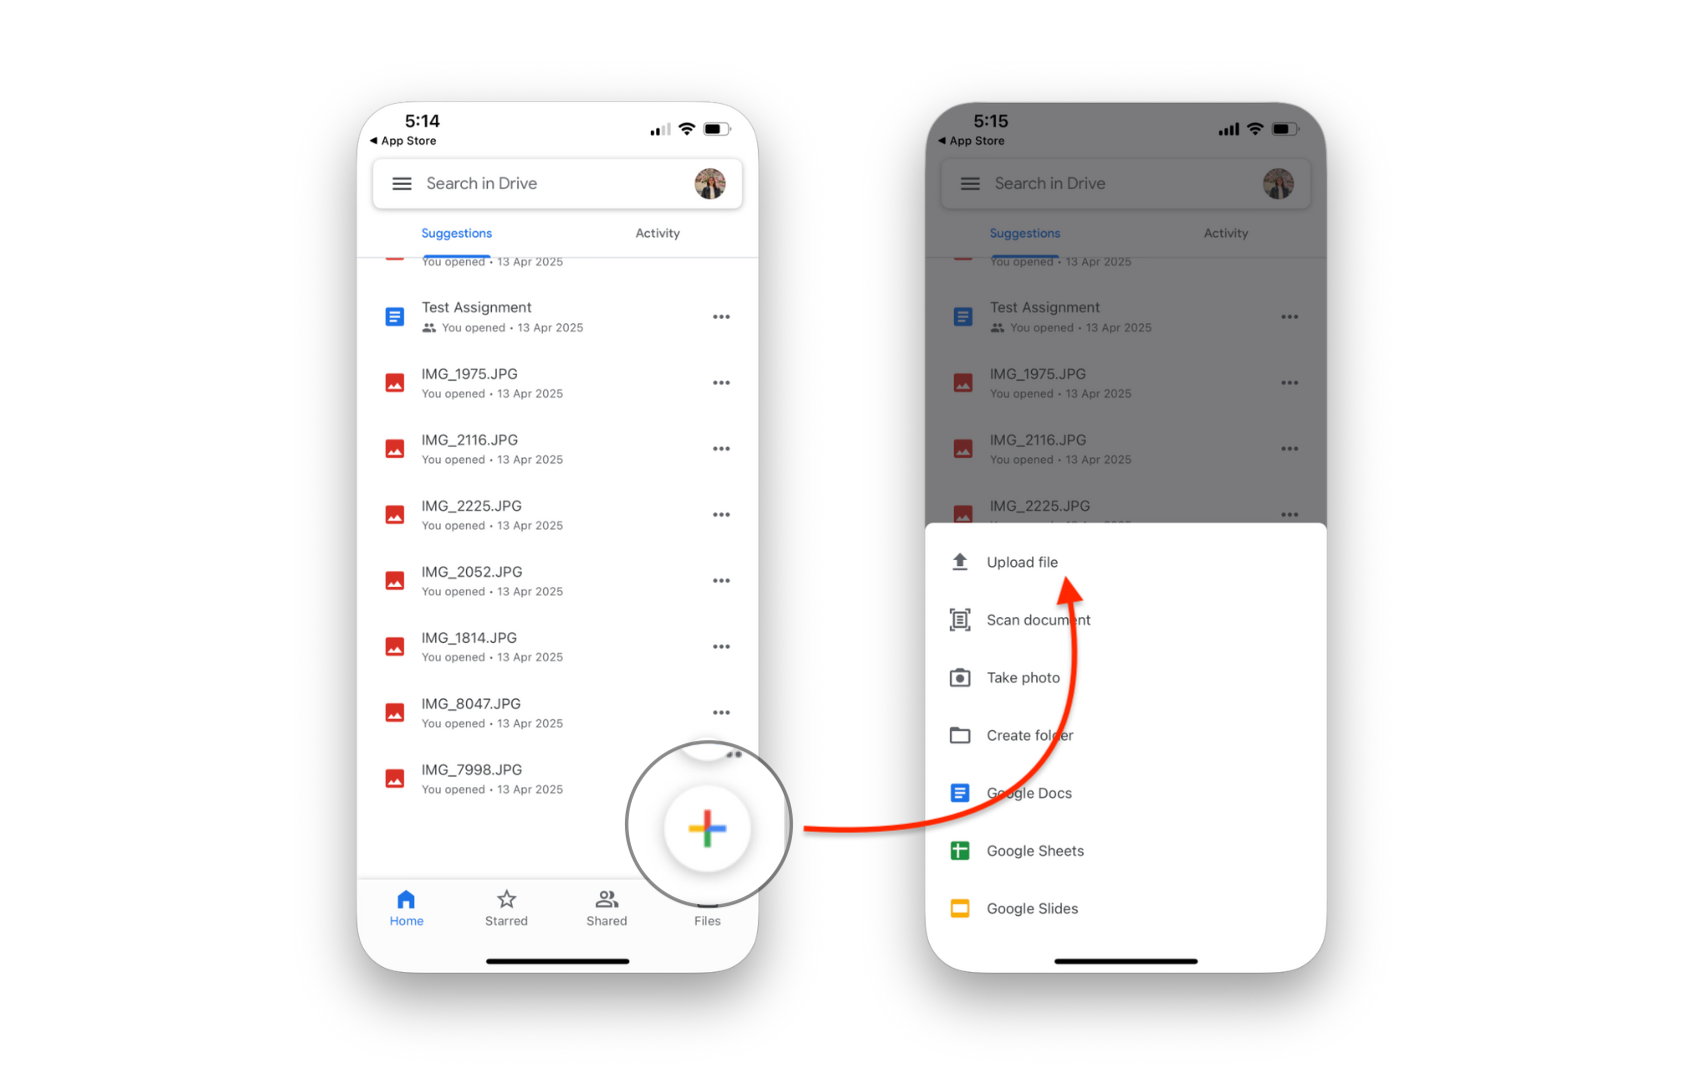
- Install Google Drive on iPhone: Download it from the App Store.
- Upload Files: Open the app and upload the files you want to transfer.
- Access Files on PC: Log in to Google Drive on your browser and download the files.
Which Transfer Method is Best for You?
Method | Best For 🏆 | Pros ✅ | Cons ❌ |
|---|---|---|---|
AltTunes | Fast, all-in-one transfers | ⚡ Works wirelessly & via USB, supports all file types | 💰 Paid software |
iCloud Drive | Wireless transfers | ☁️ No cables needed, integrates with Apple devices | 🌐 Requires internet, limited storage |
File Explorer | Quick photo & video transfer | 🖥️ No extra software needed | 📸 Works only for media files |
Google Drive | Sharing files with others | 🌍 Accessible from any device | 📶 Internet required, limited free storage |
Third-Party Apps | Alternative options | 🧰 Various features available | 🚫 Some apps include ads or restrictions |
If you're looking to expand your storage options, consider using an external hard drive. This can be a great choice for long-term storage, especially for larger libraries. With tools like AltTunes, transferring files to external storage becomes easy and efficient.
Final Thoughts
AltTunes offers the most flexible and efficient method for transferring files from iPhone to PC, but if you prefer free, wireless options, iCloud Drive or Google Drive are solid choices—albeit with some limitations. For a more robust solution, consider learning how to back up your iPhone via AltTunes. This can give you greater flexibility and storage management without the hassle of iCloud's limitations.
Select the method that works best for your needs and make your file transfers effortless!
FAQ
How can I transfer files from my iPhone to a PC without using iTunes?
You can use AltTunes, a reliable iTunes alternative, for seamless file transfer. Just download and install it, connect your iPhone, and choose the files you want to back up or export. It's fast, flexible, and crash-free.
What’s the easiest way to transfer files from my iPhone to my PC?
If you prefer no additional software, use File Explorer on your PC. Simply connect your iPhone with a USB cable, open the iPhone storage, and drag and drop files like photos or videos to your computer.
Can I transfer files from my iPhone to a Windows PC using AirDrop?
No, AirDrop is Apple-exclusive, meaning it only works between Apple devices like iPhones and Macs. If you're on Windows, you’ll need another method like AltTunes or File Explorer.
What’s the fastest way to transfer iPhone photos to my computer?
The fastest method is using File Explorer on Windows. Just connect your iPhone via USB, navigate to the “DCIM” folder, and drag and drop your photos to your PC.
Is there a free alternative to iTunes for file transfers?
Yes! AltTunes is a free, user-friendly alternative to iTunes. It offers flexibility in backing up and transferring specific files from your iPhone to your PC without any hassles.

