A question which many iPad users want to be answered is 'How do I back up my iPad?' After all, data is the most valuable commodity in the digital world.
Table of Contents
And your iPad is a slate full of memories – photos, music, videos, books, and whatnot. You can’t risk it getting erased. That’s why you should backup iPad to Mac or PC.
A backup is like a mirror image of the data inside your iPhone or iPad. Although Apple iOS provides backup systematics is robust too, it lacks customisation. When you want to restore the files to your iPhone or iPad, you don’t know which file has data for, say, messages or ringtones.
Those files don’t have a human-friendly name. Thus, you can’t preview and restore them. That’s why you need the iPad backup tool iMazing.
Introduction
The ability to extract data from backup is one of the most useful features of iMazing. Your hunt for the solution to “How do I backup iPad?” ends with it. This iPad backup extractor allows you to browse your backup files stored on your Mac or PC.
You can use it to check your system apps – Messages, Photos, and others – or browse files of your device. Another helpful feature is the ability to keep multiple backups. It’s helpful in case the backup gets corrupted or you need some data which you changed earlier.
iTunes, by the way, allows only one backup per device. With each backup, it overwrites the last one. Continue reading to know how iMazing has an advantage over iTunes.
How to Backup iPad to Mac and PC using iMazing?
As iTunes keeps only the latest backup, overwriting the old one, iMazing brings some amazing benefits:
You can browse the content of the backup.
You can use one of the backups to restore the device to that time.
You can transfer your data to another device.
iMazing is like the Time Machine for your iPad. You can keep multiple backups and still have minimal disk usage. Every new backup store only those files which have changed since the last backup, thus saving much of your disk space.
But iMazing keeps the files linked. So, when restoring a backup, you’ll get the device as it was during that backup. No complicated process needed on your part. You even get to choose and restore selected data instead of the complete backup.
Choose where you want to keep the backup on your Mac (or PC), change the location, use different storage space for each device or select an external storage space; you can do it all without any extra charge.
And here’s how to back up your iPad.
Steps to backing up iPad
Step 1. Download iMazing and install it
The amazing iMazing is available to download on Mac and also, Windows PC. The software is available for free. Download it, and once installed, you can backup and recover iPad without iTunes. The downloaded software, by the way, comes with a limited trial period.
Once the trial is over, you have to pay for the license. The “Single” package is available for less than 30 dollars for lifetime use for one PC.
You can download iMazing for free from the developer’s official website.
Step 2. Launch iMazing and pair it
The next step to backup iPad to PC requires connecting your iPad with USB. Launch iMazing and just for the first time, use the wire supplied with your device. Your iPad will ask if you want to “Trust this computer”; allow it and your device is paired with the PC.
Next time onwards, you can use the Wi-Fi mode to connect both the beasts. But remember to keep both the devices connected to the same Wi-Fi network.
Step 3. Review backup options and get things done
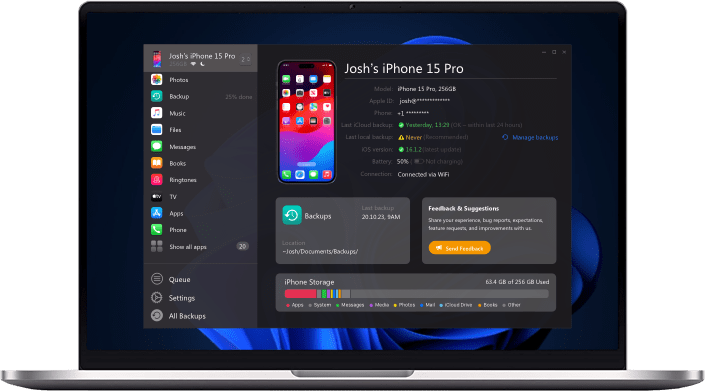
Once the connection is successful, your device appears in the left sidebar. But “How do I backup iPad?”
Oh, it’s right there. Select your device, and you will see all the actions you can perform, for your iPad. Click Back up to open the Backup options window. Following are the settings you can change there:
Automatic Backups Scheduling
Set the frequency of your device backups.
Backup Encryption
Encrypt all the backups for the device. Once you enable backup encryption, any future backups will be encrypted whether you use iMazing, iTunes or any other iPad backup software. So, take special care of the password.
Backup Location
View and change the default backup location, and also change the backup location for the current Apple device.
Backup Archiving
Enable backup archival to prevent backup data from being overwritten. You can also set automatic deletion of older backups which you think might not be needed.
And get, set, go.
Once the backup is finished, close the window. And you are all good pal! Whenever you feel like modifying the settings, feel free to do so from the Device Options window.
Now that you know how to backup iPad, but keep in mind that your iPad backups do not include the iTunes Media Library. It means Music, Podcasts, Ringtones, Movies, Books, etc. won’t be available there. They are anyway, always synced with iTunes.
However, if you need to keep copies in your PC, use iMazing to transfer them to a folder easily.
Can you backup iPad 2, Mini, or any other to an external drive?
Yes, with iMazing, you can.
While iTunes backups iPad to a default location in the PC, iMazing allows you to select different locations, including an external drive. You can restore iPad from a backup stored on your external hard disk or even networked drive.
And those won’t be overwritten.
Once your device is connected, here’s how to backup iPad to an external drive or NAS
Select your device in the left sidebar.
Click Options from the list of actions.
In the Device Options panel that opens, click Change beside the Backup Location.
Click on Add Backup Location and select your external drive or any other location.
Confirm your selection, and you’ll see it in the current backup locations panel.
Close the panel, and it’s done.
iMazing will create a folder named iMazing. Backups folder at the root of that external drive. Just in case, it can’t do so, iMazing will display a warning message.
Nothing to worry there! Create the folder manually at the root of the disk. Then, select that folder as the backup location following the steps above.
Also, when backing up to a network drive using a Windows PC, the location must first be mapped to an alphabet. Once you map it, you can add it as a backup location in iMazing.
How to backup my iPad to iCloud?
Backing up iPad to iCloud is a straightforward process and can be achieved through the Settings app on your iPad. The interface might change because of updates in the iOS version, but the process remains somewhat similar. And here’s how to back up iPad to iCloud:
Connect to a Wi-Fi network.
Open the Settings app and tap your name at the top.
In the list of Apple ID settings, tap on iCloud.
Next, tap on iCloud Backup.
Toggle it On, and that’s all you need to do.
Your iPad will back itself up regularly. In case, you want to backup iPad to iCloud manually, tap on Back Up Now and copy your data to iCloud right away.
The process, although easy, has a few drawbacks. First, if the Internet speed is crawling and the amount of data whopping, it will take hours for the backup to complete. Another drawback is that you get only 5GB of storage space in iCloud backup for free.
That’s why preserving your iPad data in a PC or external drive is preferable. And with iMazing, it’s hassle-free; it doesn’t cost even $30. Plus, that’s a one-time investment.
But what if I want to backup my iPad to iTunes?
Well, there is a pretty straight forward answer to that: Just do it!
Using iTunes as a backup machine is the by apple supposed and predominantly used method to backup your data to prevent any data loss in case of you having a new or broken iPad. In order to get a glance of Apple’s backup magic you just have to follow these steps:
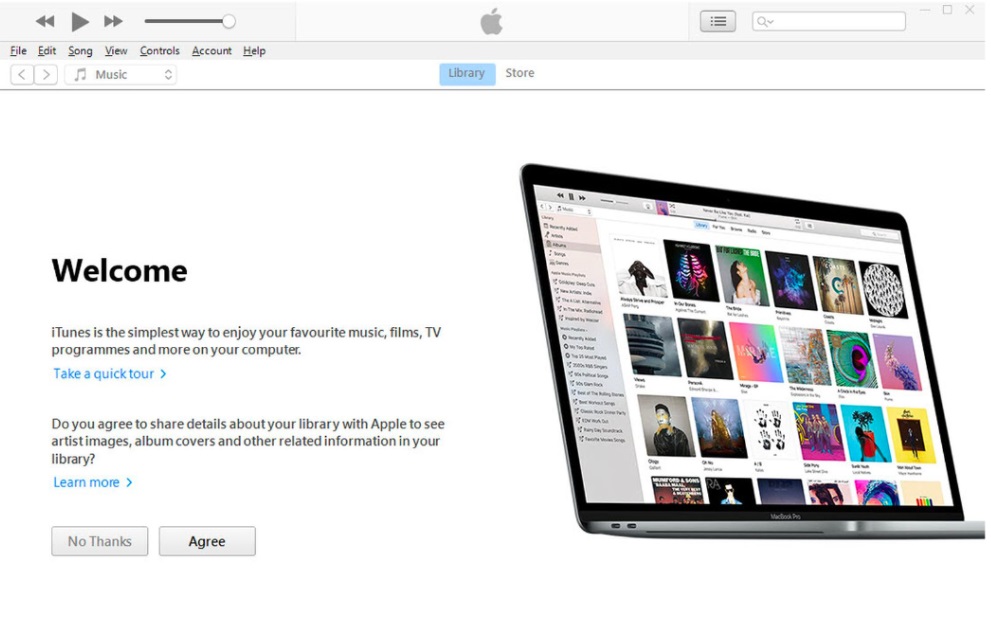
Install and open iTunes
Before you can even think about backing u your iPad with iTunes, you surely got to have iTunes installed on your machine.
Not done yet? Click on the links below to get a fresh iTunes install.
After the download has started, just install the software like you have done it so many times before.
Connect your iPad
In order to use iTunes as a free backup method, you got to connect your iPad to your Mac or PC. Make sure you have a strong bond between both of your machines so that your iPad shows up successfully on your PC/Mac.
Sometimes there might be a pop up on your iPad asking you if the connection between both of your devices is trustworthy. Just follow the steps on the screen and, yes, you can trust your PC/Mac, there’s no virus going on over there, just a safety feature from Apple’s side.
Select your device
Check out the left section of your iTunes screen. All of your connected and supported devices should be listed over there. Select the iPad you want to back up. If nothing is showing up, make sure you connected your device properly, otherwise, we’ve got you covered!
Check this out if you still got no connection.
Let’s create your backup!
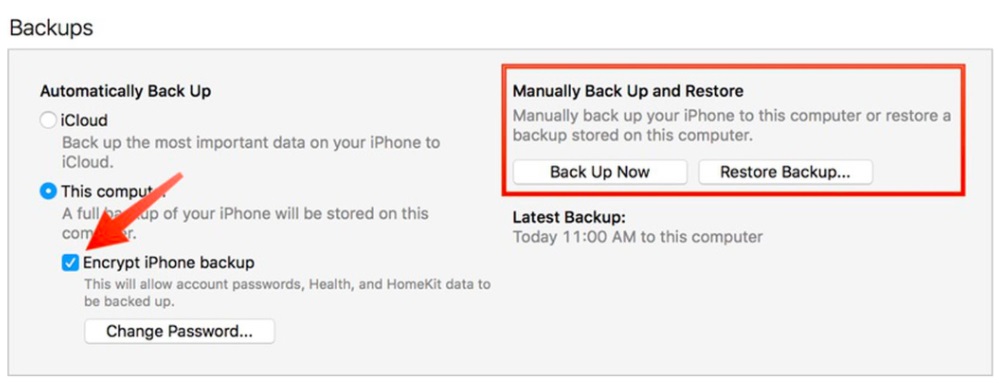
So now everything is working fine, iTunes’s open, your iPad is connected and nothing is holding you back to finally create your iPad backup. Just click on “Create Backup” and let the magic happen for a while. After your backup is done, there check the date and time of the latest backup to make sure everything worked properly.
Hopefully, your backup worked and you’re less stressed out now knowing iTunes got you covered for bad times with lots of data loss!
How to restore iPad from backup?
Now you know all about how to backup iPad to PC, external drive, networked drive, or iCloud, time to find out how to restore iPad from backup.
With iMazing, you can restore backups made with either iCloud, iTunes, or iMazing and you can even browse a backup before restoring. With that feature, iMazing empowers you to choose what data and which apps you want to restore.
Browsing through the backup data, you can make a conscious decision to restore your device to that state as in the backup. And here the steps –
Step 1. Launch iMazing and connect your iPad
Yeah, when you have your iPad paired, all you need is to launch the amazing iMazing app and connect your iPad to your PC. Just a quick reminder, you can use either USB cable or Wi-Fi.
Once connected, the iPad appears in the left sidebar.
Step 2. Review the restore options and confirm
Now, select your device and click on Restore a Backup from the list of actions.
iMazing then presents you with a list of backups. You can choose your iPad backups or pick one from other backups available, from the list, to restore. When you confirm your choice, you get to the options for data to be restored. The following are those customisation options.
Data
Choose what data you want to transfer. It includes your email accounts, contacts, calendars, and other sync services, along with the device settings and system files.
Apps
Choose the app data you want to restore. Unlike iTunes, which doesn’t restore the app itself, iMazing backups have the app installation files along with the saved data.
Once you’re done with the selection, click Next and then, Restore to proceed.
If the selected backup is encrypted, enter the password and click OK. Now, sit back and relax
But do remember, the backups don’t have any data belonging to the iTunes Media Library. So, you’ll have to sync those afterward. Also, restoring doesn’t affect the target device's passcode.
Conclusion
By now, you already know how iMazing fairs as a nice iTunes alternative. It can perform many tasks that iTunes does, and at times, better at them.
Unlike iTunes and iCloud, iMazing doesn’t overwrite the iPad backups. At under $30, it offers an automatic and wireless backup solution, with practically unlimited storage. Configure how frequently you want to backup and keep multiple backups without chomping down your drive space.
And the data is saved in a location you choose, either on the hard drive or NAS. iMazing also allows you to browse your iPad backups and restore your device to a previous point. And you don’t need to restore the complete backup. You can do selective data (or app) restoration with iMazing.
With iMazing, you can not only restore your iPad backups but transfer data from any other iOS devices or their backups. And the best thing is, the process works whether its iTunes, iCloud or iMazing backup.
So, get it at once! None of your backup data will be transferred over the Internet.