Before we start
Have you ever attempted to back up your iPhone? Backups are copies of your iPhone's data, acting as a 'Plan B' if you lose or damage your device. However, they can occupy a significant amount of storage space. Now, what are your thoughts? Here's a friendly suggestion: perform two clicks on AltTunes to back up your iPhone to an external drive.
![]() Table of Contents
Table of Contents
How to backup your iPhone to an external drive with AltTunes?
Given the drawbacks of the traditional method of backing up your iOS device to a PC through iTunes, such as the inability to select specific files for backup or the occurrence of frequent Terminal command mistakes, let's delve into the specifics of a more convenient and reliable alternative.
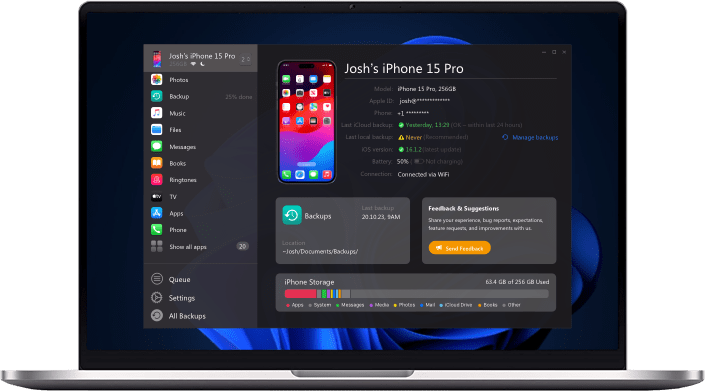
AltTunes emerges as a comprehensive file transfer tool that facilitates seamless connections between iOS and PC devices. It provides multiple options for file manipulation that go beyond what Finder offers. The app's Backup Manager allows you to schedule instant and wireless iPhone backups to a destination of your choice, eliminating the need for any manual effort!
Step 1. Install AltTunes to your PC
AltTunes is a desktop companion app for your iPhone, becoming your essential device manager for backup purposes. In addition to facilitating backups, it offers versatile file transfer capabilities for various data types, including images, music, videos, contacts, text messages, and more.
The app is available for free download and usage during the free trial period. Feel free to give it a try!
Step 2. Plugin your external hard drive & iPhone
Tap ‘Trust this computer’ on your device if your iPhone isn’t synced with your machine.
Step 3. Launch AltTunes & notice your device
Upon initial connection to AltTunes, it will prompt you to back up your device. The best part is that you can choose your external hard drive as the preferred backup location!
Step 4. Choose your external drive as the destination path
After completing the backup process, your files will be readily available on your external drive, circumventing the need for storage on your PC. If you've been pondering how to back up your iPhone to an external hard drive directly, AltTunes is the ideal tool.
AltTunes offers a range of functionalities beyond backup
- Export text messages & contacts
- Add music & movies to your iPhone bullet-speed and no quality loss
- Easily set up a new iPhone in a matter of a click.
- Transfer apps, documents, ebooks, pictures back and forth from your device
- You no longer need to be tied to 1 iTunes library. Sync as many devices as you wish.
Where to find current backups on PC?
To find where your backups are stored on your Windows 10 or Windows 11 device:
1. Open the Start menu, then open File Explorer.
2. In the left-side menu, click This PC
3. Double-click to select your PC’s hard drive—this is usually called Local Disk (C:)
4. Go to View > Show/hide in the File Explorer window, then tick the box for Hidden items.
5. In your hard drive’s folder, open the folder labeled Users.
6. This will present you with a list of users who have access to your computer. Select the folder for your account. This may be called “Admin” if you haven’t set your account name.
7. There should be a folder called App Data in your user folder. Open App data, then click through the following folders:
- Roaming
- Apple Computer
- MobileSync
- Backup
8. Alternatively, you can type in the following path into File Explorer to go straight to your backup location (where [account name] stands for your device username): C:\Users\[account name]\AppData\Roaming\Apple Computer\MobileSync\Backup
How to back up iPhone to external hard drive using iTunes
iTunes has built-in functionality for creating and viewing backups. The process of backing up to iTunes is the same for Windows 10 and 11 device users.
To back up your iPhone using iTunes, follow these simple steps:
1. Connect your iPhone to your computer via WiFi or with a USB or USB-C cable
2. Open the iTunes app on your PC, then go to the top left of the window and click the Device button (an icon of an iPhone)
3. Select Summary, then Back Up Now below Backups.
- Click Encrypt local backup to encrypt your backups. Type a password into the dialog box, then click Set Password.
You can restore your backups whenever you need them. Follow Steps 1 and 2 above, then go to Summary > Restore Backup. If your backups have been encrypted, you must enter your password to access your files.
How to Disable Automatic BackUps
Your external drive won't be permanently connected to your computer. If you connect your iPhone and the external drive is not in place, iTunes may generate an error. While attempting a new backup, the destination path will be unavailable.
To avoid this issue, it's advisable to turn off automatic backups.
- Go to iTunes Preferences > Devices
- Check ‘Prevent iPods, iPhones, and iPads from syncing automatically.’
That’s all there is to it!
Bottom Line
Let's admit it – transferring backups on a PC can be pretty cumbersome. However, iTunes is the only method available for moving your backups to external locations. An alternative solution to simplify this process is to use a straightforward iTunes replacement known as AltTunes.
Launch the app, connect your phone, choose a backup location, and you're done! This solution eliminates the hassle associated with managing your backups and iPhone files.
FAQ
Why should I backup my iPhone to an external drive using AltTunes?
Backing up your iPhone to an external drive with AltTunes provides a convenient and reliable method compared to traditional options like iTunes. AltTunes allows you to schedule instant and wireless backups to a destination of your choice, saving storage space on your device. It also offers versatile file manipulation options that iTunes may lack.
How do I backup my iPhone to an external drive using AltTunes?
Follow these steps:
1. Install AltTunes on your PC.
2. Plug in your external hard drive and iPhone, ensuring your iPhone is synced with your computer.
3. Launch AltTunes and connect your device.
4. Choose your external drive as the backup destination.
5. Once complete, your files will be on the external drive, bypassing your PC.
What additional features does AltTunes offer besides iPhone backups?
AltTunes provides various functionalities, including:
- Exporting text messages and contacts.
- Adding music and movies to your iPhone with high speed and no quality loss.
- Easy setup of a new iPhone in a few clicks.
- Efficient transfer of apps, documents, ebooks, and pictures between devices.
- The ability to sync multiple devices without being limited to one iTunes library.

Josh Brown
CEO at Softorino